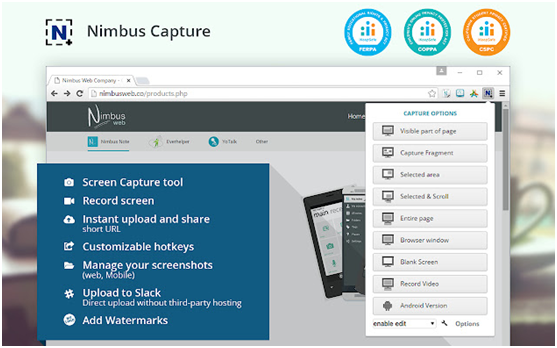
6 of the Best Screen Recording Programs in 2021
Do you ever need to use programs to record your computer screen? If you take video lessons, post videos on YouTube, or enjoy streaming live...


Discover top trending posts from our blog.
Do you ever need to use programs to record your computer screen? If you take video lessons, post videos on YouTube, or enjoy streaming live...
If you are struggling with getting enough traffic to your website, it might be time...
Developing training materials is the hardest job in corporate training. Developing high-quality content demands an...
Gaming PC Build for the Ultimate Budget Gamer The definition of a budget is different...
Do you ever need to use programs to record your computer screen? If you take video lessons, post videos on YouTube, or enjoy streaming live games, you’ve certainly had this need. And finding such a program that solves the problem isn’t always very easy. Sometimes the video is watermarked, the…
If you are struggling with getting enough traffic to your website, it might be time to look for something completely new. A good example of that would Pinterest. While this social media platform has about 300 million active users every month, it is still heavily underused. People who visit it…
Developing training materials is the hardest job in corporate training. Developing high-quality content demands an investment of time and resources. With cloud based authoring tools, the effort that goes into training has reduced greatly. Thanks to the advancements in the learning and development industry. For course content development, this technology…
Gaming PC Build for the Ultimate Budget Gamer The definition of a budget is different for everyone but I feel one should save and spend at least $1000 for a great Gaming PC Build. To be honest, I am not an AMD fan but the Ryzen 5 2600 is a…
Do you know? Over 35% of the web is powered by WordPress. There are tons of themes, plugins, and other technologies to support WordPress platform. No doubt WordPress is the best platform, but to be honest, it can be quite slow. But if you won’t take the right precautions for…
Have you ever thought of using android privacy apps? In the digital era where smartphones and computers have become an integral part of human lives, cybersecurity and data privacy has caught its attention among digital users. On smartphones, we keep our personal information and details including contacts, emails, photos, bank…
As you’re probably aware thousands of videos are published daily on social media, and any videos that you publish are going to be facing a lot of competition. That is why it is important that you try to make your videos as engaging as possible so that they’re able to…
A common concern among novice programmers is the fear of uncertainty when it comes to programming interviews. Many new programmers and students prepare themselves for this occasion by trying to learn everything in the textbook. While this may help a programmer with a test, it isn’t necessarily going to help…
At one time or another, you have probably experienced difficulty in managing your apps or completing basic tasks with them due to an excessive number of apps and websites in the world.Well thanks to a new platform, IFTTT, you can now integrate them automatically… What is IFTTT? IFTTT is…

When Purchasing a gaming monitor, you may be intimidated by the sheer number of options such as resolution, refresh rate, response time, etc. In this article we will be discussing the most important factors for purchasing a gaming monitor, and what sort of things to look out for. Resolution This…

The new Samsung Galaxy S8 and the Samsung Galaxy S8 Plus have big screens and many advanced features. These phones offer a new 10-nanometer Qualcomm Snapdragon 835 processor and software optimizations. Corning’s Gorilla Glass 5 prevents most damage caused by dropping or sitting on the Galaxy S8, but using a smartphone case…

Do you use Excel? If yes, I am sure you know there are gazillion things that you can do in Excel. However, there are only a handful of tasks that most of us have to do on a daily basis. Hence it makes sense to know some powerful Excel hacks…
YouTube has forever changed the world we live in for the better. It provides a safe platform for people to express themselves freely, not only by posting videos, but also by watching them, commenting, and becoming a part of an online community with common ideas, values and beliefs. We all…

Maecenas condimentum eleifend mattis. Pellentesque habitant morbi tristique senectus et netus et malesuada fames ac turpis aenean porttitor ac ligula in laoreet. Nulla vel finibus enim. Quisque at porttitor quam. Nulla hendrerit sem sed eros efficitur lacinia. Pellentesque ornare suscipit tristique. Sed ultrices maximus posuere. Morbi ut nunc a mauris…

This won’t be another ordinary article about photo editing apps and how to make your photos even more amazing. Ok, just a little bit because we all love to make breathtaking pictures and post them on Facebook. However, this time,we’ll go even deeper and let’s find out how we can…

There are enough complications in our lives without having to constantly groan when thinking about coming back home. After all, who needs extra chores and responsibilities after a prolonged day of work? Is anyone really happy at the prospect of not being able to simply sit in a comfy chair…

Apple is about to reveal some changes on how users and developers interact with the Apple app store. According to Phil Schiller, Apple’s senior vice president, Apple is looking to improve most of its services starting from its discovery process to the apps review experience. However, the most significant shift is the…

Facebook in recent years has become the most successful social network site on the internet. In 2011, it was reported to have approximately 500 million active users. That is literally one in every 13 people on earth! Facebook makes it possible to find and contact millions of people. This is…

You’ve downloaded some of Facebook’s many apps, only to delete them when you find that they are useless. With so many apps available, how are you to know which ones you should check out first? Here is a list of the most useful Facebook apps ever, complete with descriptions of…

Public Wi-Fi can perhaps be considered one of the culminations of the path our technology is taking. It allows one to connect to the internet from a vast variety of devices and allow everyone to have the world’s information at their fingertips, all from wireless waves surrounding us and eventually…

The boffins at Facebook have done it again – in a bid to make the site more than just a social network, Mark Zuckerberg’s brainchild has now announced the launch of its “Instant Articles” feature, securing its place as an often-accessed source of news. The feature will comprise an in-app…

Free Studio YouTube to MP3 Converter DVDVideoSoft has developed a free Youtube to MP3 converter called FreeStudio. It’s not like any other youtube to mp3 converter. It has no limits on the length of the converted file and I consider it as a premier quality software. Kudos to the developers…

Update: A small orange is not what it used to be. I used to love their service and support but now I am planning to switch my hosting provider. An Unbiased Review of A Small Orange Hosting. My blog is hosted on A Small Orange since a year now and I decided…

Easily Block Porn / Adult websites without software’s. Free DNS services will help you block porn, gambling and unwanted websites. Open DNS, Norton DNS for Home and others mentioned below will help you block porn sites without costing you a single penny. The content in the internet is uncensored. Usually children…

Cloud computing is gaining momentum all over the world. Its beneficiaries include businesses, individuals, organizations, software developers and the list continues. In order to understand how small businesses can make use of private cloud services for IT security and more, it is relevant to take a look at the way…

While the stigma of “the lazy work-from-home guy” is now receding, it is still prominent in a lot of peoples minds. In fact, if you mention to someone you work from home, this is likely how they picture your job: https://www.youtube.com/watch?v=w0BWjkA1IIA Why is this inaccurate stereotype receding? Well, the rapid…

Fast Start metro is a Google extension for your Google Chrome web-browser, it’s important to note that this extension will not work with Mozilla’s Firefox or Microsoft Internet Explorer. Fast Start is a new and innovative extension that transforms your speed dial, commonly known as your browser start page from…

Wherever you are, and whatever you are doing, chances are you have one or more devices that can happily hook up to a wireless network. Whether it is a phone or tablet you also use over cell phone 3G or 4G, or your laptop, hooking it up to a good…

Though cloud computing is considered safe for sharing crucial information, some risks and business security issues may intrude. Every secured network can be broken by an expert hacker or inside attacker. Indeed, newer security challenges are making their way as cloud computing enables access to dependable and supportive business technology.…

If you’ve invested in a tablet computer then chances are you’re going to want to make the most of it. In general they’re more expensive than phones but if used correctly can play a big part in your life.Use some (or all) of the tips below to ensure that you’ll…

Multiple twitter accounts will help you separate your personal life from your professional networks. The sames rule applies to Gmail, Facebook and other social media websites. Simultaneously logging into more than one twitter account in the same browser was not possible before. The only work around was using incognito mode in Chrome, private…

This is a sponsored post written by me on behalf of eBay. All opinions are 100% mine. We have all become too attached to our phones that we depend on them for our day to day tasks. Don’t you all think, we are too much dependent on smartphones that we…

Yes, SEO conferences can be a great source of information and networking opportunities. But let’s admit it: You can’t attend every SEO conference out there. Not only can they get expensive ($900 to $3000/conference), the travel and preparation takes a lot of time, too. With that in mind, you’d want…

We know iPads can access the Internet, take crystal clear pictures, and play music, movies, and TV shows with the touch of a button. But there are many other hidden features. Here are 10 other things you may be surprised to learn your iPad, iPad Air, and iPad Minis can…

Update: A Small Orange no longer has an affiliate program. Best Hosting Affiliate Program Review – A Small Orange A Small Orange Hosting never ceases to amaze me. ASO is one such hosting company that really cares about their customers. Their technical support team is experienced and committed to provide excellent…

The new Nokia Lumia 930 is the best windows phone yet . Its the latest GSM flagship device on Windows Phone. The Nokia lumia 930 with its high specs than ever before can now compete with its Android and iPhone counterparts. Although specs don’t affect user experience. A total package…

Let’s be honest: wearable technology is pretty much unwearable. Smart watches and rings are clunky, some devices make you look like a cyborg, and most jackets or shirts with built-in technology are unflattering to say the least. Some of the technology is mind-blowing but one of the biggest deterrents for…

LED TVs are increasingly becoming popular due to its energy efficiency and awesome picture quality. These full HDTVs offers high quality picture and longer lifespans if used properly. A simple tip is to install a high quality and reliable to increase your TVs lifespan. To enjoy watching sports or movies,…

While some might have thought that cash registers are here to stay, the time has come for them to go. All the people who are thinking about starting a small or medium business should consider investing in such a system, and all the owners thinking about making a switch ought…

WordPress 3.5 was released on 12th Dec. After I upgraded to WP 3.5, Problems like adding posts, Media, Arranging Widgets started. At first i thought that it could be because of some plugins. hence, I deactivated most plugins and later all plugins at once but nothing worked. The second thing…

All you Sims 2 lovers here is an offer that will make you happy. Origin is giving away Sims 2 for free but for a limited time so act fast. In-order to get this deal please follow the below mentioned steps. Create an account – https://connect.origin.com/in/create Download Origin http://origin.com/download Launch Origin and…

Smartphones today are not just trendy. They are also very useful. It seems like smartphones are very popular for both the aged and the youth alike. If you don’t have one yet, you need to get one for you either for your personal pleasure or for business use. Today, there…
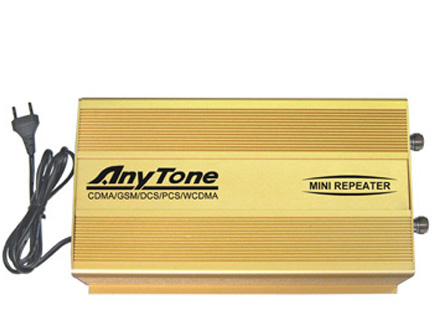
Having a mobile phone signal booster for home use can ease all your troubles concerning dropped calls, unsent SMS, and inconsistent Wi-Fi connection. You are probably not the only person in your neighborhood that is experiencing signal trouble, but you can be the first to take direct action to resolve…

Online Shopping Tips To Consider Online Shopping is the choice for many household in recent years. Who would not love to shop from the comfort of home? Also, you get an option to choose from thousands of varieties of the same product but you may not get the same choice…

Its been 5 months since I purchased Asus X200 CA and I felt its really important to share my view after using this notebook for this long. Though its priced reasonably at $299.99 on Amazon.com you may still have doubts about the performance and built quality. Before I talk about the…

The challenge of designing visually stunning websites is not something new, but with the new generation of professional online design platforms such as Webydo the barrier to entry has been lowered significantly. Professional designers often struggle with the balance between the craft of creating visually compelling sites and the complexities…

An easy trick to detect invisible users or friends on Gmail. I’m 100% sure that invisible users can no longer hide from you unless they take precaution. Yes, this method has a disadvantage but it doesn’t matter much. I read a similar article at WikiHow but, they have a different…

Access Thunderbird Client on Any Computer Worldwide Wouldn’t it be great if we can access our personalized Thunderbird Desktop Client from anywhere in the world ? But unfortunately, The main disadvantage of using desktop email clients is that it can be accessed only on one computer. But, using this simple…

Unbiased Snapdeal Review Recently I ordered a Pansonic Viera 39B6D LED TV from Snapdeal and the process was not smooth. Although the product was delivered in 5days via Gati Courier (Delivered on Tue Dec 17 00:00:00 IST 2013) the service was not upto the mark, especially the customer service agents were…
Snapdeal’s Trustpay and its Hidden Terms Snapdeal is one of India’s top online shopping websites. If you do a google search using the keyword “Top 10 shopping sites in india” , you will find Snapdeal in the top 5 spots. I have purchased a lot of items from Snapdeal and the…

As the Xmas is approaching, here is a big giveaway for your guys. We are giving away 5 Kepard Premium VPN accounts. Please read our article, that will give you an idea about Kepard Premium VPN . I will quickly mention the features of Kepard. Online Security :You can prevent data hack as…

Easily Back Up Your DVD ISO for Free WinX DVD Copy Pro, developed by Digiarty Software, is a handy DVD backup tool that allows you to copy any DVD or burn ISO image to blank DVD. It works efficiently and creates original DVD copies so you can watch DVD movies…
Outlook Web App (OWA) Improvements The Microsoft Outlook Web App (OWA) is the cloud portal to Microsoft Exchange, and the newest version is the most sophisticated yet. If you’ve not yet accessed your email in the cloud using OWA, these new features could persuade you to give it a try.…

7 easy ways to reduce lag Lag is the enemy of all online gamers, and can mean the difference between life and death – in the gaming world at least. However, lag can affect anyone, not just gamers. It causes video and graphics to slow and then jump forward, it…

A popular but expensive way to communicate Not only has the use of mobile phones to communicate increased manifold over the past decade, but so has the number of ways in which people communicate over these devices. People send each other photographs via smartphone and businesspeople use them to share…

Using Irfan View your can easily stitch or join two images vertically or horizontally. You don’t need any skills to perform this task. All you need is Irfan View and 30 seconds. In the previous article I had shared a similar tutorial “Combine two image vertically or horizontally“. Using today’s…

You can easily combine/stitch/join two or more images vertically/horizontally without using Photoshop or any other complicated image editing software. All you need is an internet connection. Yes, you guessed it right! Its an online image editing tool that is extremely easy to use and understand. Take an example of two…

Rage when gaming? From the FPS’er to the Combatant – what type of Gamer are you? This infographic developed by Virgin Media, who are all-too aware of what causes gamer rage. Don’t let lag be one of them get you high speed broadband from Virgin Media

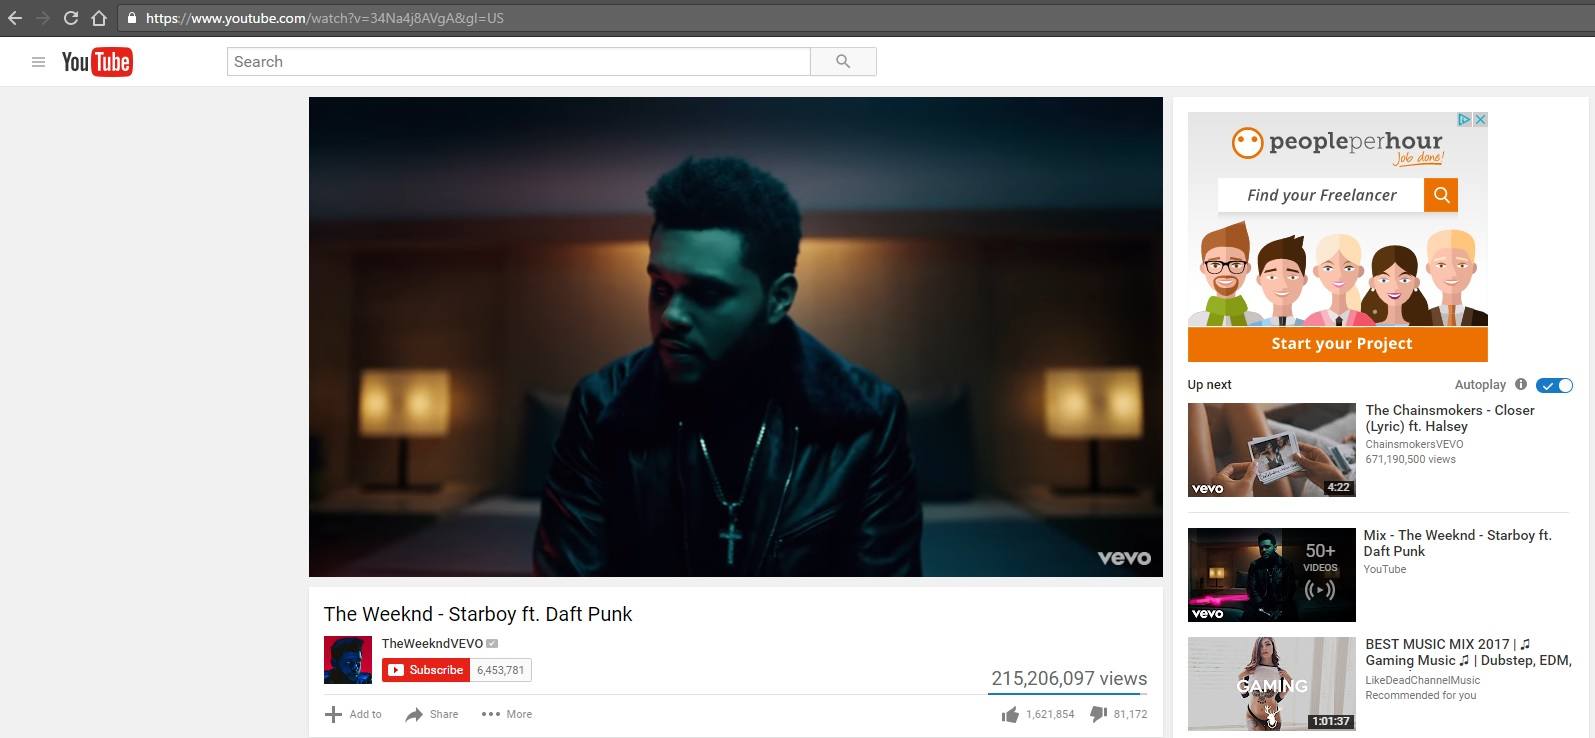
You can easily skip YouTube video advertisements and save your valuable 20 seconds. I never had any problems with YouTube ads because, it had a skid button after 5 seconds. YouTube provides all the services free of cost so ads help them recoup the cost of maintenance. However, for some…
Have you ever opened your internet browser to discover all your bookmarks have been deleted, your email account open and your mails already read, or your Facebook profile photo having been replaced by a picture of a donkey? I’m sure many of you will find the above scenarios very familiar,…

There are a few versions of Windows Server and if that’s not enough, the licensing options are confusing at the best of times. The important thing is to make sure you are not paying for something your business does not need and that’s why understanding the licensing options is critical.…
The PDF file format is at the same time one of the most convenient file types and one of the most frustrating. On one end of the spectrum, it is compact, universal and easy to share, but on the other side, it is hard – sometimes impossible – to edit.…
With e-commerce fast becoming a cliché associated with the last century, m-commerce, or mobile commerce, is springing up as the new trend in conducting business and interacting with customers. A business just isn’t cool enough if it can’t be reached through a Smartphone. As a result, goesAPP opens new avenues…

We all check our PF balance once we resign from the company. To be honest, most government websites are still in the jurassic age. Its a pain in the wrong place as there are no instructions to guide people. The Employee PF Account Number colum has 3 boxes which says…

You are reading this post because you have multiple Skype accounts on your computer (Windows and Mac OS) . Even I have two Skype accounts and the purpose of each Skype account is different. One is for my logo design business “Bleeping Design” for which the Skype id is “BleepingDesign”…

One of BleepingTech’s reader Aaron john asked a question in our forum regarding configuration of social comments plugin. He also faced a problem while creating the Facebook app. Aaron said, it was asking for a canvas URL. I”m trying to answer his question by installing this social comments plugin. I will specifically…

Making it to the top is a challenge. Whatever your goal is, it will require serious mental strength, discipline, fortitude and an unwavering confidence in yourself and your capabilities.However, staying at the top can be just as hard. After all, when you’ve succeeded in something, the temptation is there to…

Cheap Digital Download, a price comparison service for PC and Xbox games, has contacted us to host this giveaway. We will be giving away 1 Free CD Key of the Game of your choice! This giveaway is open to all of you, lucky worldwide techs, and will end on August 20, 2013. The winner will announced the next…

With WhatsApp claiming to be delivering more than 17 Billion messages per day, there is no doubt that chat applications have gone main stream. What started as a simple push notification based text chat on smartphones is now evolving into complex media with text, emojis, videos, stickers and pictures. Looks…

How to remove “This entry was Posted in Uncategorized” ? If you have tried using the Twenty Eleven or Twenty Twelve WordPress theme you will find “This entry was Posted in Uncategorized on June 1, 2013.” or something similar to it. It depends on the category and date of your post.…
You can easily direct users from your contact form to PayPal.com when the user/customer clicks the submit button. Such cases arise when you have an online business where the customer has to provide details about the order. I was in a similar situation in the past 2-3 days when I…

Onefeed, the new social desktop for Chrome users, is launching out of beta this week and is here to add significant meaning to your new-tab-page. Say hello to the future of the desktop; the new-tab-page which doubles as your dashboard to easily navigate the web. Onefeed believes that the time…

Disabling Facebook’s “Message seen” feature is very simple and easy. Previously on Facebook, you could read messages and never bother replying back to those messages because the sender is not aware whether you have read the message or not. Gone are those good days , Now the sender would definitely…

Yes you can create a gmail account / id even without having a mobile number. According to Google you need to have a mobile number to create a new email account but there is a way to bypass it. Disclaimer: This tutorial is not intended for any wrong practices. This…

When Google is your best friend, Its essential to master in Google Search. The key to appropriate search results are smart search queries. Using this slideshow you can get your online PhD in Googling. You need to understand the basics of Google search. I have seen people typing their questions…

PC games are not only a great source of entertainment but also there are many health benefits by playing games like Faster reaction times,Improved concentration, Learning new stuff, Fun. So the next time someone says you are wasting your time you know what to say . Everyone loves playing games, be it…

Is it possible to root an Android Device without a PC ? Presently, Android is the one of most customizable mobile operating systems. Android is well-known for its awesome features and capability of customizing, that’s why more and more people get attracted towards it. Almost every mobile manufacturer has started…

Unable to Start the Firewall! Shield Unreachable. I will help you resolve the Avast Firewall Problem. “Firewall Not Available” Its a known bug in Avast 8. My avast! firewall stopped working suddenly and I tried all sorts of ways to resolve the issue but didn’t work. Finally I found a perfect…

Bloggers who migrated from Blogger to WordPress are facing issues redirecting via the blogger mobile URL/template. The URL ends with m=1. lots of 404 errors are shown in Google webmaster tools. The blogspot URL looks like http:/site.blogspot.com/test.html?m=1 . Blogger 301 Redirect plugin Version 2.1 by ‘Sudipto‘ fixes this problem. Recently an update…

10 Best Public DNS Servers List DNS Servers does help optimize internet speed a little bit. Updating the Internet DNS server configuration will improve the performance of your Internet connection . Previously, I had written post on Finding the best dns servers based on your location. Let me talk about…

Free Online PDF to Excel Conversion Tool PDF has been one of the most popular file formats in the business world for some time now, and with good reason. There are many advantages that come with using PDFs in a business setting. First and foremost, this file format is easily…
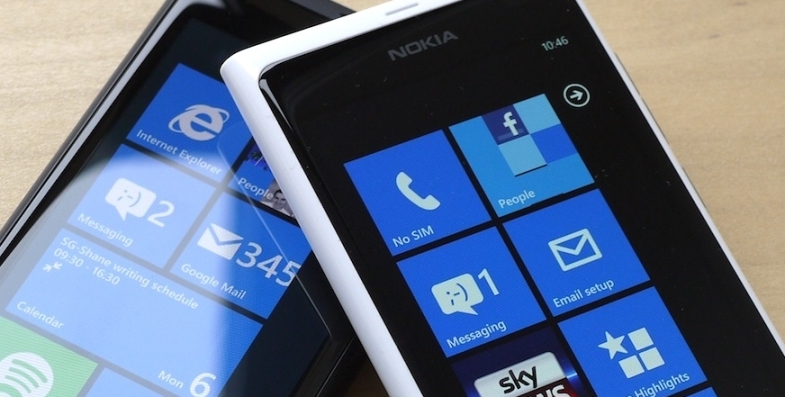
Turn off Auto Spelling Correction in Lumia Predictive text or auto spelling correction in Nokia Lumia can be very irritating when you use slangs or short text. We usually use short text in messages so that it would fit in the limited 160 characters. I usually face this problem when…

Zen Ultrafone 701 HD review – Android 4.2 Jelly Bean OS As the production cost is decreasing day by day phone manufacturers are now able to provide cheaper options. Zen Ultrafone 701 HD is a 5 inch phone with a quad core processor , 8 MP auto focus camera and a…
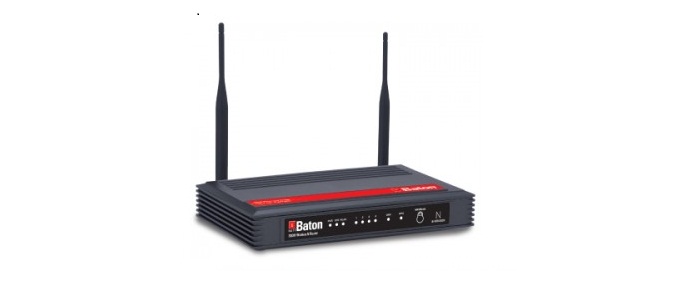
How to Port Forward iBall Baton Adsl Modem Port forwarding an iBall Baton modem is very easy and a simple process but before we begin lets understand ” What is Port forwarding? ” Let me explain you in simple terms. Router = House Wall = Firewall Imagine your modem /…

The infographic depicts crime offenses per year in the United States. Streets and highways show the greatest amount of offenses whereas banks show the least amount of offenses per year. As opposed to popular belief, most crime happens during the day. Residential homes are more likely to get burglarized than…

In-order to add password to your hard drive or flash/usb drive in Windows 7 and Windows 8 you don’t need any third party softwares. You can lock your hard drive using BitLocker. Its a very simple process and you would be glad to know about it. How to lock your…

How to kill Father Mathias: E button not working I have seen posts saying “Can’t mash E fast enough *ending/spoilers* “. That is actually true, even though you press the ‘E’ button repeatedly, you still won’t be able to kill Mathias. Its a known bug in the game. I discovered…

Usually the size of the command prompt (CMD)box is small even you try to maximize , It only covers half of the screen vertically. There is no way you can drag the edges to adjust to the monitor screen size. There is a way to do this by going to…

In-order to install CentOS-5.5-i386 / Linux on VMware 1.0.4 you need to have an ISO image of CentOS and also a licensed version of VMware installed on your computer. I’m assuming that you have already installed VMware on your computer. If you don’t have an iso image of CentOS, you can freely download…
The next major shift in SEO is on the way, and now is the time to start preparing for it. Because of technological limitations, Google has been forced to evaluate every page on the Web on its individual merits for decades. The only associations it could make were provided by…

Wei was captured by Mr Tong who tortures him badly. Wei then tries to escape the building, but at a certain stage the space key does not work when Wei tries to save himself from falling off the building. This is a known bug and its really frustrating. I pressed the space…

In-order to stop adobe reader from updating you need to change the updater options from the menu bar. Follow the quick tutorial and stop the abode reader update notifications forever. Lets waste no more time. Open Adobe Reader Go to Edit and click preferences select the updater option from the left…

If you are developing applications today are you developing with cloud technology in mind? Most developers know that the cloud has its advantages, offering speed of deployment, reduced costs and in most cases, platform independence. For an app to be a true cloud app it should be able to support multi-tenancy and…
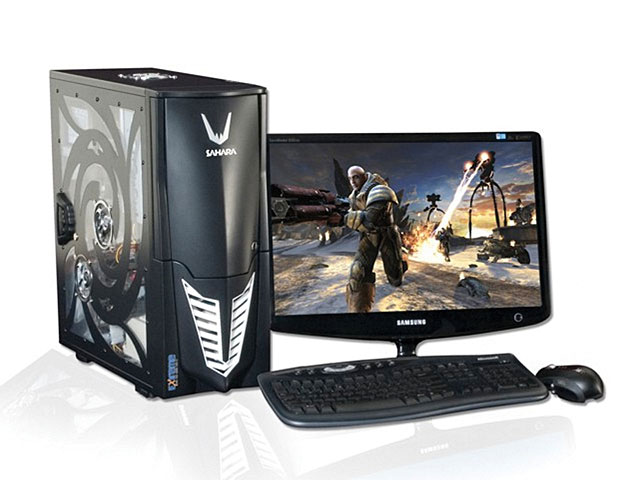
Build the Ultimate Best Budget Gaming PC / Computer for Under $800- $1000. The setup features a Intel Core i5-3470 Ivy Bridge, GIGABYTE GA-H77-DS3H LGA 1155, Corsair Vengeance 8 GB etc. I recently assembled my computer for $800 and I’m very happy with the performance. I have carefully selected the…

Mother’s Day is coming and you want to buy her a new phone. Your wireless carrier offers many great devices, but the key is getting something great for your mom’s unique interests. These are the five best phones that you can choose from this year’s top lineup. They are all…

How I solved the Black Border Problem on my Full HD LED Monitor I fixed the overscan/underscan on an ATI card using catalyst control center options. I had a hard time finding a way to fix it but finally the screen fits perfectly. The problem only occurred when I used…

If you own your own business, you probably already know the importance of good marketing. With today’s society heavily relying on e-commerce for their businesses to flourish, the use of web design is a vital key to success for many of these individuals. While where you spend your money is…

Introducing Norton Zone Using Norton Zone you get instant access to all your important files on the go. Log in to any of the devices( Mobile,tablet, Desktop) in which Norton Zone is installed and get instant access where at any time.Any file that is dropped in the Norton Zone folder…

For many business owners, maintaining a blog is an indispensable promotional tool that provides the opportunity to attract huge amounts of traffic. A quality blogging site can help a business establish themselves as a trusted site or expert to every visiting consumer. It allows the ability to create greater brand…

Searching for free images for your WordPress blog is a big challenge. Of-course, You can find free images on flickr by doing an advanced search by checking “Only search within Creative Commons-licensed content”, Free photos bank, Free digital photos, Morguefile, Openphoto and some others or you can click your own…

A book is a man’s philosopher and guide along with being a friend. Books not only give a pleasurable reading experience but also help in taking certain decisions. Seth Godin’s books fall in this category. His books have never failed to provide assistance in marketing and related topics to anyone…

How to Remove Background from an Image without using Photoshop ? Now you can remove background from any image (jpg, png, bmp etc) online in less than 30 seconds. You won’t need photoshop or any other complex photo editing softwares to perform the required task. Even a newbie at photo…

Smartphone apps can be cool and convenient methods to work with social media on the go. There are a multitude of applications available on all devices that can help you manage your social networks, most of which can be downloaded for free. Updating your social media and blogs through…

Kepard Give Away: 10 Premium VPN Accounts for Free Wouldn’t it be nice if you could surf the World Wide Web without worrying about viruses, malware and other threats? That wasn’t possible before, but modern technology has taken a giant leap forward. Kepard provides the very best VPN service for…

If you’ve had your PC for awhile, and its slow speed is dragging you down, you are probably the cause. That’s right: Most causes of PC slowdowns, delays, errors and crashes are due to something introduced to that PC by the user. It’s almost as if you, yourself, are the…

Solve The website specified cannot be reached Error in Google Page Speed While analyzing the performance of my blog on Google Page Speed Insights I got this error message “The website specified cannot be reached “. I tried to clear the browser cache , tried different browser and even asked…

Anchor text is the visible, clickable text you see in a hyperlink. In most browsers, it’s displayed in blue underlined text. Why is anchor text important for SEO? For numerous reasons, but mostly because search engines weight their Search Engine Results Pages (SERPs) based on it. In other words, anchor links…

In order to connect to high speed internet through a mobile phone you will need to have the following: • Computer (with built-in Bluetooth) • Mobile phone (with Bluetooth) • Has a data port • USB connection cable (supplied with the phone) • Internet access STEPS: 1. Connect the…

Your Galaxy Nexus promotes your style and good sense, but don’t let it stop there. No other product allows you to display the unique, cutting edge design of your phone while expressing your personal and protecting your investment like carbon fiber skins. Love the look of your phone and feel…

PDF is usually the format of choice for sending computer documents, because it keeps the formatting intact and allows recipients to view the document’s contents without any problems. However, if the recipient wants to make changes to the document, he or she will need to convert the PDF into its…

When it comes to choosing between subdomains and subdirectories, there has always been a dilemma. Unfortunately, there is no hard and fast rule that can help you to pick the better one. The decision is rather subjective, which means depending on certain circumstances and requirements, you need to make your…

Facebook previously gave news that it would announce an Android based all new device early this month. A new Facebook phone now appears emergent giving form to those rumors. This will be a Facebook phone, with a Facebook theme for the Operating System in place of Google’s Android OS. This…

While Instagram is a visual social media platform, you still have to sell yourself in your profile if you want to reap the rewards of online popularity. This isn’t necessarily the narcissistic quest it sounds like. There are many reasons to put forward a solid online bio. If you’re using…

I remember walking around with my film camera as a child and not allowing anybody else to use it, or making sure not to click the shoot button unless I see a perfect pose, in fear that the film may run out. In the current era of advanced technology these…

Good Bios For Instagram #Secrets Instagram is a social media site that has had quite a bumpy ride. Despite what the faux statistics tell you, their user numbers have jumped up and down like a frog with the hiccups. People use statistics to say that Instagram grows by X number…

Social networking is becoming increasingly important to society nowadays, especially for companies. Many businesses have start tapping in the world of social media where it is not only a place for your customer to find your company info but also the content or the daily updates about the company’s products/services…

Top 10 Alternatives to Weebly Website Builder Gone are those days of familiarizing programming codes to create your own website. Today’s technology has brought with its sophisticated Content Management System programs that allow you to experience these ostensible Do-It-Yourself Website Builders. The main goal of the developers of these software…

The Nikon D5200 Review The Nikon D5100 is an excellent camera which offers high quality video and photo, but the sluggish performance tarnishes its attraction for me. Nikon has solved this problem in the D5200 by using the same new metering and autofocus systems which is found in the D600.…

Today while checking my email using windows 8 mail app , I got this error: ” This app can’t open check the windows store for more info “. Then I noticed that apart from mail app, the others including Messaging,Maps,Skydrive, Photos,Videos,Games, Sports,News are all suffering from the same error. All…

You might have encountered with this strange and annoying error. This app can’t open for Built-in Administrator account please sign in with a different account and try again. or while User Account Control is turned off. You need to turn on UAC There is an easy solution for the error.…

Getting quality twitter followers is no easy task. Well here are some tips that you would like to know about. Follow the big guns in your niche, use proper #hashtags as keywords in your tweets , Reply your followers using @replies, Don’t forget to give some love using retweet ,…

People create blog email lists because they want to remind people that their blog exists. They may wish to raise issues surrounding the blog, or may wish to raise concerns about topics and start up some new ideas for future topics. Sometimes people will not get a very big response…

The first step to knowing how to choose a DSLR camera is to persuade a professional photographer to show you the workings of a DSLR. This is important, because a DSLR camera is known first and foremost for its versatility. This refers to taking photographs, and not to whether you…
Avast Black Screen Problem – windows 8 | solved You might have encountered a black screen problem after installing Avast antivirus on your Windows 8 operating system. You would notice that once your account loads the screen automatically turns black and you won’t be able to see anything except a…

You can now get Avast Internet Security genuine license for free. Internet Security license for 1 , 2, and 3 yr can be obtained using some simple steps. Don’t worry, I’m not giving you any crack or pirated copies but its Avast. They have launched a program where a person…

What are the benefits of using Google Glasses ? Indeed, this is a question worth pondering over given that the invention presents an alarming indication that the future is here already, and about to get more futuristic. What do we do with a device that virtually eliminates conversations with…

First of all, what is a landing page ? A landing page is nothing but a page that is shown when a customer clicks on an ad or a search engine result. These pages are of utmost importance and if designed properly, they can really generate amazing conversions for the companies! …
Thanks much in part to this year’s Consumer Electronics Show (commonly referred to as CES) this year has consumers around the world excited to see what gadgets of 2013 will bring to the market. Below are our top 5 gadget picks (in no particular order) out of the many presented…

When it comes to do-it-yourself home projects or even hands-on business efforts, having the right tools is necessary. And for similar jobs, the cordless drill is a must have for any tool bag. But when it is time to choose the best cordless drills, it is necessary to understand which…

If you have a passion for photography then this is the best time to upscale your passion to professional grade. Full-frame DSLRs are the most appropriate choice of digital camera for professionals or beginners. Advantage of a full-frame sensor over regular small digital cameras is that a full-frame camera performs…

I am sure the three PayPal employees, who activated a domain name called ‘YouTube.com’ to share videos, wouldn’t have expected it to become so popular. Started in 2005, the website soon picked up and gained rapid fame in a year’s time. Sharing videos online was a novelty and people became…

“Someone please turn off Facebook Notification Sound , its so irritating” – I heard my friend saying this as he was getting constant messages and notifications from his friends . Every-time he received a message Facebook makes its new notification sound. What most people do ? They simply turn off…

Buying a new mobile phone has never been an easy choice, but today the sheer variety of models available makes it even more complicated. Whilst having plenty of choice is certainly a good thing, it leaves you with more options to consider and that means a more complex buying process.…
WordPress has become the most widely used content management systems (CMS) on the web, partly because it is easy and quick to install, partly because there is a massive community behind the platform, all creating and sharing their plug-ins and enhancements, and partly because it is free. When you’re ready…

Most of us can remember the first time we played a video game. For some it was the Pack Man era and for others it was the pong era. New Generations have been raised with the Play Stations so they don’t understand how blessed they are to have pocket sized…

Most businesses have realized that the use of Internet is not just limited to desktop browsers. There are many people who access the Internet through mobile phones or tablets. In order to be sure that a website is well displayed on a mobile device, you need to use certain tools…

After the release of Sony’s innovative and unbelievably water proof Smartphone Xperia Z, millions of eye balls were set on the releases of Mobile World Congress 2013. Tech blogs and news sites were buzzing from the probable features of upcoming Smartphones but no one was having the idea about the…

2012 was a big year for Facebook, not only did they announce plans for a search engine based within their platform, they also launched the UK’s first social network real-money gaming app. The reasons for this undertaking was purely to build themselves extra income and also to offer something back…

With smartphones replacing practically all of our handheld electronics (the smartphone is demolishing the handheld gaming market, the portable camera market and sat-nav market) we are becoming ever more reliant on our beloved little rectangles of plastic and glass. 7 or 8 years ago, mobile phones were little more than…

A big concern for any home owner is what goes on in your own home when you are not around. Whether you are concerned you will be broken into or if you have a dog and want to keep an eye on them, there are a number of…

The parts played by smart devices in our daily lives have now become very well known to most of us. We all know that we are assisted by them in our personal as well as professional life to a great extent. Be it the smart phones or the tablets, every…

Although there is still a lot of speculation surrounding the next console, the Xbox 720, regardless of what it will really offer loyal Xbox fans, has generated a frenzy in Gamer Land. Although there is only so much we can guarantee for sure, based on what industry experts have had…
For many technology professionals, the ability to share intellectual property can cause a sudden case of paranoia. The idea that somebody could access your hard work in efforts to make a profit can be daunting. Escrow Associates is a company looking to rid the technical world of that fear. They…

Do you ever perform basic ADSL2+ troubleshooting steps before calling your ISP ? The first step most people do when their Internet stops working is to call their Internet service provider. Example : BSNL, Optus, Big Pond, AT&T etc. In some cases , the issue is not even related to…
If you’re at all familiar with software developing, even if you’ve just dabbled in it and would like to hone your skills a little more, you’d be aware of the code signing certificate that can be used to verify the authorship of the code. Whether it’s downloadable software that users…

I was chatting on Facebook with my friend. I wanted to share a link from a *certain* website with him. I pasted the link on the chat window and tried to send it across. Surprisingly, I got this error: “The content you’re trying to share includes a link that’s been…

In this technically driven age, one can easily find people giving the regular and stereo typical telephone calls a miss. Everybody has a smart phone (hey! We are not judging) and they actively indulge in video calls through phone. Are you still fidgeting around with your phone, while the whole…

Upgrading to the latest version is what people do as soon as a new update is available. Similarly I had upgraded WordPress to 3.5 as soon as it was released without even thinking that it may create problems for me . To make things worse i did not even back…

Tech enthusiasts are often keen to talk about the latest advances in computer technology. Usually, this will revolve around the most exciting internal components – the brains of the PC, which are always becoming faster, smaller, and cheaper. It’s therefore quite understandable that consumers are relatively unaware of changes to…

If you love science, it’s likely you have spent a significant amount of time searching app stores for great science apps with interesting facts and fun games. This article will discuss 10 killer apps for your smartphone. WolframAlpha — This app solves math problems, brings up economic data from…

The strategies necessary for proper search engine optimization have changed tremendously since the advent of Penguin and Panda. These changes by Google made it necessary for users to take a lot more time developing content and to make certain that it’s useful to their readers. If you’re using WordPress as…

Android is an operating system based on Linux. It is specifically intended for touch screen devices such as mobile smartphones and tablets. Right now, it is one of the leading platforms for smartphones and tablets. One of the most enjoyable aspects of this OS is its gaming capabilities. Developers are…

Going to find the best jewelry around you? No need to visit the physical market when you have an android smartphone since I’m going to provide you details of 5 best jewelry apps that make your shopping very comfortable and easy. Stay at home and enjoy jewelry shopping through your…

There is a new parameter of technological excellence established as Samsung unveils Galaxy Grand with 5.0-inch display, Android 4.1 along with several innovative features. This will also include earlier functionalities like pop up video display where users can run videos simultaneously with other applications and a virtual S voice assistant…

The world’s Largest Annual Innovation Event has just wrapped up, and the million dollar question is – ‘What was the best of the best at CES 2013?’ Well, if you ask me, I would say, this year’s International Consumer Electronics Show was all about TVs. The biggest crowds and…

This tutorial will show you a simple way to backup saved passwords in Firefox. Regular internet users have ‘n’ number of online accounts and each of them have separate passwords. Remembering all of them is tough job for everyone. Frankly speaking, even i have a hard time remembering passwords. Although…

Penguin updates have greatly changed the landscape of search engine marketing that incorporates SEO tactics. This pushed website owners to seek other platforms like social media connections to promote their site. As a result, millions of online marketers got excited about social media marketing; hence, the rush to promote businesses…

Apple has more than 20,000 educational apps in its app store. There are apps that help college students do everything they need to: manage their time, study and even have fun. Here are five great apps for college students. Quizlet Quizlet has millions of flashcards available, and it allows…

Tips to Search Securely in Google Whether you are planning to research new material online or if you are simply browsing for private documents and information on your own computer, searching securely allows you to stay protected while also keeping your search history private. Searching securely online or through your…

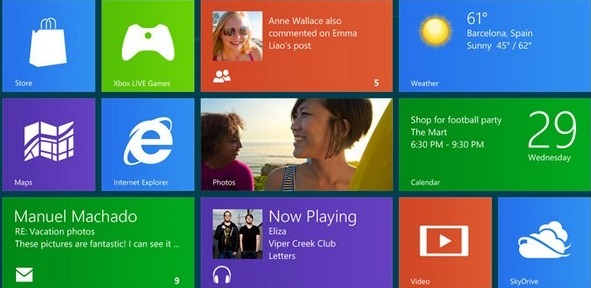
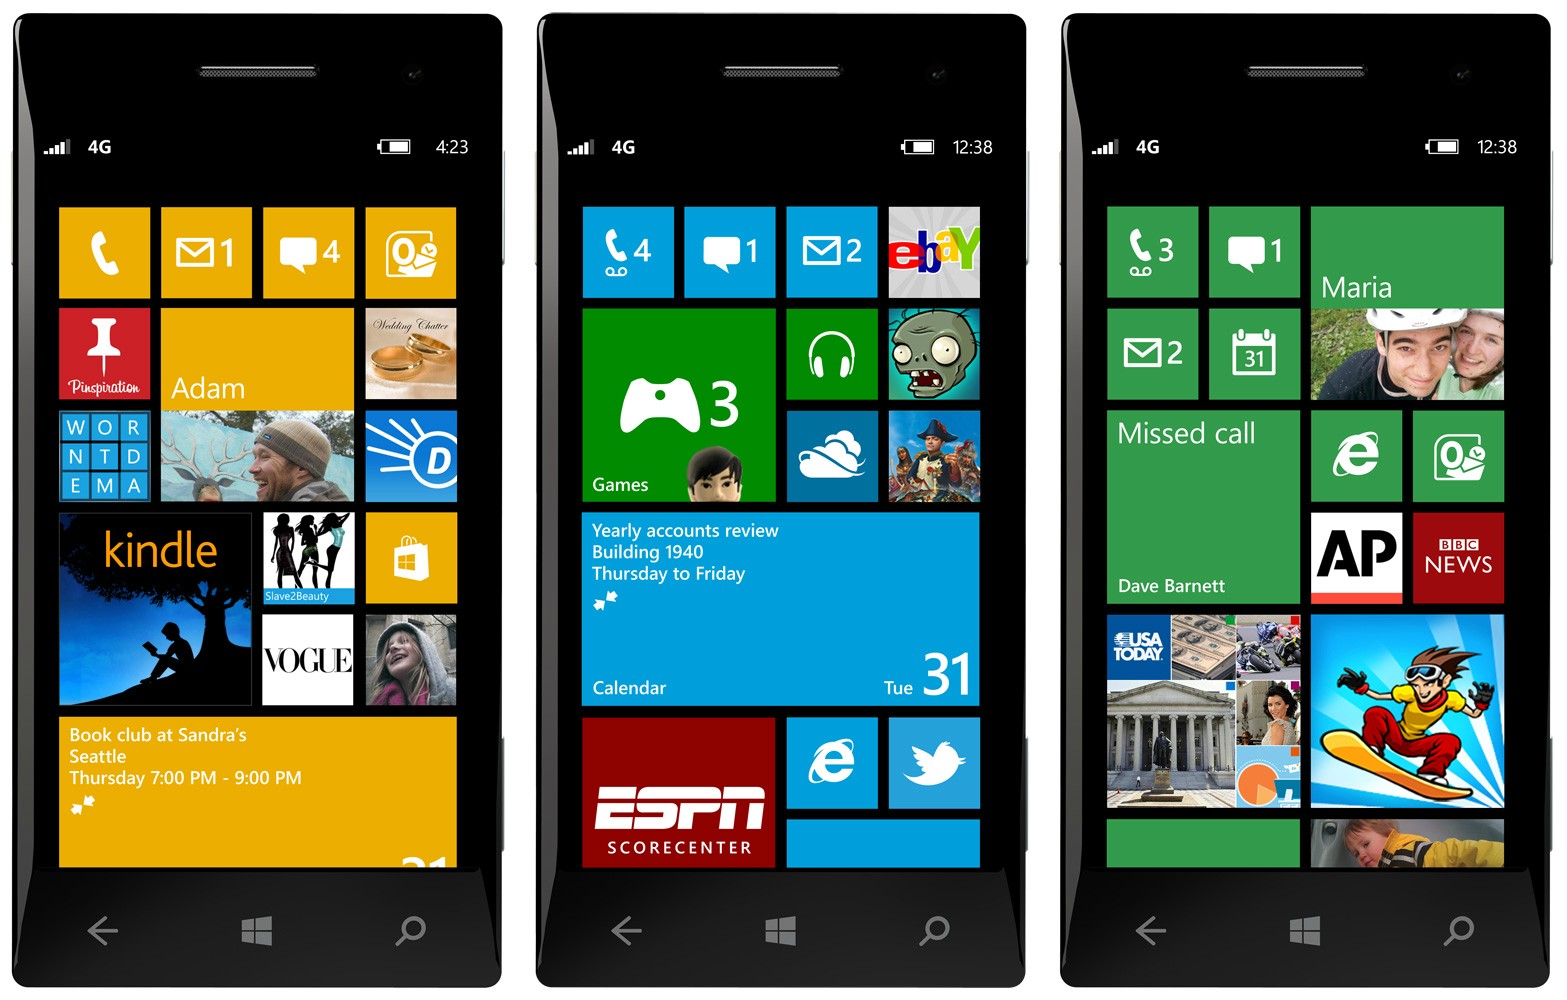
There has been a lot of fuss in late 2012 about the Windows Phone and in customary Microsoft style, they used both holiday seasons (Thanksgiving and Xmas/New Year) to their full extent in getting their message across with a number of devices launched and heavily marketed in the last few…

People just love getting new electronics, and if you’re into that sort of thing, HD televisions are something that any fanatic can get behind. But it’s not enough to just go to the store and ask the employees which one the best is, you need to do your research so…

In the modern business world, all professionals require applications that enable them to view figures, edit documents, communicate effortlessly, and otherwise carry out their jobs to the greatest possible standard. This isn’t as simple as it sounds, however. Many a person has been frustrated by the fact their company phone…

BlackBerry, as you all are aware, is a leading brand that is sold across the world. These wireless handheld devices are produced by Research in Motion, RIM in short, the very first of these devices that was launched way back in 1999 was an email pager Today BlackBerry have crossed…

Anybody serious about online marketing will want to run some A/B tests to find out what version of a website converts the best. But what do you test? Here are the top 5 elements to start A/B testing on your Website. Call to Action Testing your Call To…

New smartphones come out every month. There are some nice ones, some terrible ones, and some fantastic ones that anybody who is anybody should buy immediately. Much like how 2012 had its fair share of amazing phones like the Nexus 4, Samsung Galaxy S3, and the iPhone 5, 2013 should…
If you ever find yourself wondering whether our high-tech gadgets make life simpler or more complicated, you are not alone. These computer and smartphone apps are designed to make life simpler by storing and organizing information and letting users access that information through novel ways. From iPads to computers to…

The new generation is full of smart devices and gadgets which are manufactured by the leading technical companies in the market like Apple, Samsung, Nokia, HTC, Blackberry and many more. They are continuously creating the smart devices and making the work effortless in all the ways. These devices…

Many people are familiar with Razer as a gaming peripherals company, making desktop and laptop parts designed to optimize gaming experience and ergonomics. This year, however, the company sought to expand its horizon and actually released its first full-fledged gaming machine: The Razer Blade It’s a name that any…

How about a day without music? It’s almost impossible for a music lover like me. Headphones are the must have music gear for every music freak. Technology has entirely revolutionized the quality of music, so over the due course of this article we’ll be focusing on headphones with an excellent…

It now seems like more and more people are getting concerned about their health. From the banning of solariums in some states in Australia to changing the design of cigarette packets to make them less appealing, it seems like it will only be a matter of time until people start…

Here are three laptops that are perfect for students. Amongst other things, their price is low enough so that the student may just be able to afford it (in most circumstances). They are also good for doing schoolwork on. They are not geared towards gaming, entertainment or Internet surfing. They…

Can anyone remember the days before electronic mail? It seems a lifetime ago, but there used to be a time where parchment and quill was the preferred method of written communication. The first E-post it note Email (electronic mail) was originally used as kind of post-it note. Before the…

Are you wondering about the things that could help you save your Mac from destruction and keep it forever? Well, it is a hard task but you could actually keep your Mac longer if you just observe proper measure to save it from obliteration. There is no overheating…
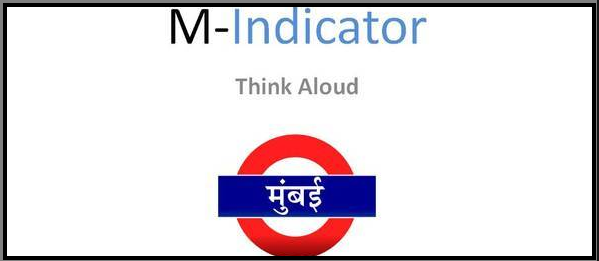
Like Mumbai’s famous Vada and Pav (Vada-Pav)combination, m- indicator has become a part and parcel of every Mumbaikars lives. m-Indicator is a powerful tool that almost every Mumbaikar carry in his/her pocket. In mumbai the cheapest and the best mode of transport is train and knowing the train timings really…

WordPress is a great platform for bloggers who want to enhance their online presence, share thoughts with their audience, become popular and eventually earn additional income. However, few people become successful as bloggers, mostly because they don’t have the right attitude and are afraid to experiment with their audience. Here are…
Research in Motion (RIM), the Canadian company that holds the BlackBerry patent, is fighting hard to remain a worthy competitor in the current battle over smartphone supremacy. The latest salvo fired by RIM in the battle is aimed squarely at Microsoft and the personal communication devices powered by the…

Top 5 Adsl2+ Modems List Nowadays Best Adsl2+ Modems are supplied by Internet Service Providers like Optus, Bigpond, TPG, iiNet, iPrimus, BSNL etc.People who need full technical support for modems should purchase the Adsl2+ Modems from their ISP. But for others who want to purchase some of the best modems…

Are you ready to market your online business with blogging? Are you hungry to generate targeted leads by sharing your insights? Blogging can provide you with a free or low cost platform through which you can develop your expertise and establish your authority. Few entrepreneurs use blogging effectively to grow…
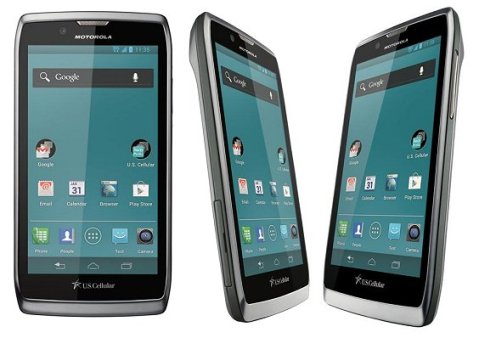
Design The Motorola Electrify 2 is a decent looking smart phone. With dimensions like 5.1 inches tall, 2.6 inches wide, 0.3 inches thick, and weighing in at 4.6 ounces, the Electrify 2 is close to the average size of phones with similar release dates. It has a 4.3 inch…

For a long time Apple has been lauded as a great inventive force, coming up with new ideas that sell extremely well and then doing it all over again. However, there is evidence coming to light that Apple might have stolen the majority of their inventions. As the accusations added…

Listening music on the go has become pretty much a norm for everyone irrespective of their gender, profession or age. When you set out to purchase a decent MP3 player that offers performance, style and convenience, most folks would simply suggest an Apple iPod. So, what really sets Apple iPod…

“Wi-Fi” is a term used to describe a wireless Internet network that runs throughout your home, place of business or even in a lot of public areas like restaurants and shops. Though in the past Wi-Fi was used mainly for desktop or laptop computer access, in recent years the use…
Windows 8 has been the talk of the town in the recent times and you can find several infographics on Windows 8 going viral, especially the one titled “ Top 11 features of Windows 8 ”. And finally, after a long anticipation and waiting, BleepingTech has published this infographic that…

Investing money on high branded and good-quality printer models does not mean your printer is malfunction proof. If the cost of printer ink cartridges isn’t high enough already in the market; you should also save money in case of printer accidents like this. Hiring service for printer repair is always…
Blog contest s have become extremely popular as creating a buzz about your online venture today. A simple contest or giveaway session can create an influx of visitors into your site. As a visitor, you must have already come across many blog contests online. These contests are powerful because…
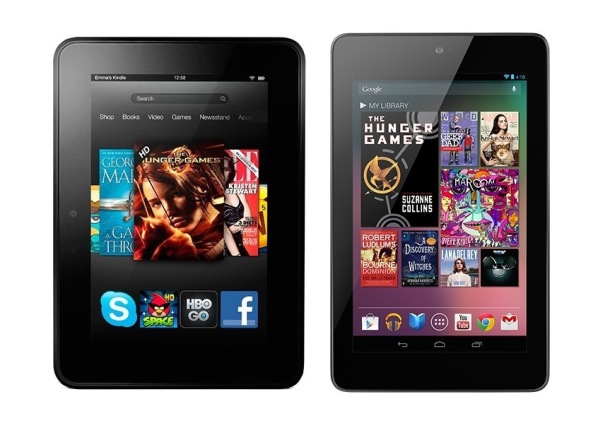
As tech aficionados everywhere will be well aware already, one of the defining battles in the tablet computer field is that between the Kindle Fire and the iPad 3. There’ll be those who can’t help themselves and have to have both, but for those of us who simply don’t have…

With the saturation of smart-phones the world of travel has changed dramatically in the last few years. Gone are the days of carrying around cumbersome travel guides or phrase books. Now a travel adapter for your phone charger is enough – and once you’re armed with some good travel apps…

Today lets learn to setup social login on WordPress. Example : Facebook, Twitter, Google, Yahoo, LinkedIn, Windows Live etc. Quick registrations using social networks will enhance user experience. Rather than using the default WordPress registration process where you need to setup username, email address and the password is sent to…

It was last week that China’s once-every-decade meeting of the 18th Communist Party Congress commenced. This is the meeting in which the Chinese government decides on changes in leadership within the tightly-controlled party, and much like anything else in the nation, the government puts notorious restrictions into how much…

You can simply add or change Email Signature on Nokia Lumia in less than 30 seconds. Let me go straight to the point, Inorder to change the default email signature i.e ” Sent from my Windows Phone ” to your own personalized signature. Please follow the below steps. Adding Email…

Are you always worried about your loved ones? Do you find it hard to trust others? Need to keep an eye over someone who seemed suspicious? Ever fancied being a spy? Your Android phones might provide you an answer. Modern technology never fails to prove their worth. Recent developments came…
The worst possible thing that can happen to any PC gamer is to be stuck with a computer that doesn’t meet the requirements of his/her favorite game. Unfortunately, with the quick turnover in computer technology, this scenario is a common occurring theme amongst gamers. The only way that you…

Bose SEI2 Headphones: Bose has released Bose SEI2 Headphones to be the durable successor of the popular MEI2 headphones. Many people may remember the MEI2 headphones because were some of the first headphones to set the precedence for high quality craftsmanship and sound for mid-range priced in ear headphones. These…

As many new apps are daily added to the already huge iTunes list, there should be no wonder that the iPhone becomes an important part of your busy life. Existence of numerous iPhone apps for travelers may mean traveling to remote countries without having any stress But since the travel…

In-order to setup Gmail with step 2 verification on Nokia lumia you will need an application specific password. This password is a one time password generated by gmail. Instead of using the normal password, you will now have to use the application specific password. Today, I will help…

The smartphone market is a fickle bunch. Consumers are always on the lookout for the biggest, brightest, and newest technology out there, and they won’t take no for an answer. Well, with the Nexus 4, none of that changes. The only thing that changed? The price. If you’ve ever tried…

Pinterest has recently introduced a new verified website feature which will not only verify your website but also help you get a do follow backlink.Today I will guide you to verify website on Pinterest. Its very simple as it a simple HTML file verification method. In this process a…

Hotspot Shield Elite VPN, Virtual Private Network, service adds a layer of “must have” protection when connecting your computer to the Internet by establishing a secure tunnel. The secure tunnel uses VPN technology to keep your online identity and information safe from hackers and snoopers. Hotspot Shield Elite allows…
AWStats is one of the best open source Web analytics reporting tool.Using this tool you can track daily visitors,page-views,hits ,views by location etc. It works almost like Google analytics but it can’t be compared with analytics as its much more advanced than AWStats. If you have chosen Hostgator as your…

According to unofficial reports, the iPad Mini might be available to the public without a 3G or 4G connectivity. This is to reduce manufacturing costs on the device and to let users save on miscellaneous expenses for 3G or 4G data access. Apple is said to release a 7.85-inch tablet…

Back up Your Photos Online There is an old saying that photos are memories in time. I certainly agree, our pictures are among our top most valuables. In the past, photos were printed out and kept in albums where they why somewhat safe. If you ask your grandparents for a…

The major breakthrough in the eCommerce industry is Magento for sure. From 2008 to 2012, it has become the most sought after solution in the industry with its wide range of features for the creation and management of an online store. Online Business and Magento Whether you want to…
Do you want to get a free copy of ScreenCamera,the desktop recorder ,webcam recorder and your virtual camera solution.Everybody loves freebies right.So grab your copy as PCWinSoft is giving away some of them for BleepingTech readers ScreenCamera is a cool gadget every user should have installed on the PC.…

000webhost provides free as well as premium hosting solutions for users. Its also known as the best free hosting solution for WordPress. To install wordpress manually on 000webhost.com you will need WordPress downloaded from www.wordpress.org and a free account at 000webhost. Recently, I tried to host my new domain www.unleashthegadets.com…

Today most of us recognise the importance of a well maintained blog as part of our online presence, whether it is for business or personal use. Thankfully there are several great services which offer a quick and easy way to get up and running in the blogosphere and WordPress…

WordPress is undoubtedly a great platform for search engine optimization. According to the Google spam Chief, Matt Cutts, it takes care of about 75% to 80% of the mechanics of SEO. This number can be improved further by adding SEO plugins to your blog. These plugins ensure that your…

The Asus Padfone 2 was just announced today, and while the original Padfone was a terrible concept that many didn’t find appealing, the second iteration aims to change all of that. What Asus brings to the table is a new plan, one that most technology companies have yet…

Business is a source of income for you and your family; so it is definitely the first priority to satisfy other basic needs. Accordingly, the more efficient you are the more will you earn and this in-turn provides you with a better lifestyle and a secured financial future. To…

When most people think about managing their website, they often think of the tools that are available on the traditional desktop or laptop. Well, with the fast growing app market on both the Android and iPhone platforms, there are so many cool apps on the market that can help manage…
I’m running a locksmith company in Seattle and therefore, I have enough idea about the problems those come in the way of a locksmith. I believe that when there is a problem ,there is a solution too. So, today I have obtained the solution of my work related problems. The…

You may need to use some sort of computer away from your home or office. It used to be that your only choice was a laptop. But these days, using an iPad or some other sort of tablet computer is growing in popularity, as are smartphones.So which mobile computing…

Apple’s inventions are always given red carpet welcomes. However, their Maps app has not been welcomed well by many around the world. A city has been moved into the ocean, MC. Donald’s is replaced by a salon and an entire street has been erased completely. If you have these problems…

The prime concern of employers is to search the outsourcing web sites which are safest to work with. Therefore, they always write queries in the online search boxes “Which Outsourcing Sites are the Most Safest to Work With.” In fact, employer’s query possesses million dollar worth, and everybody who pays…

Most bloggers primary concerns are writing, marketing and monetizing their site. I have been blogging for several years and can understand why these are their biggest concerns. However, many bloggers don’t even consider the importance of taking the necessary precautions to keep their site from being hacked. Don’t wait until…
The world of smart phones is fast paced and littered with the shattered remains of failed products. The two dominating operating system creators, Apple and Google, are about to be joined by a third, Microsoft. Can this new OS be the key to spring boarding Microsoft into smart phone stardom?…
You have an iPhone and you want to provide your devices with Internet access (especially your iPad)? No problems. In order to do that you’ll need a jailbroken iPhone and a special app that will turn your iPhone into a Wi-Fi spot any place you like. Sounds interesting? Then let’s…

Things have not been going well with Apple’s new operating system, the iOS 6, since it was released. Compounding the situation is the immediate release of the iPhone 5 into the hands of millions of consumers. According to reports, 60 percent of iPhone and nearly 40 percent of…
Easiest Tutorial: How to use Putty on Windows? Putty is a computer application that enables computer users to work with a remote Linux system from a Windows enabled PC. Though this application was originally intended to be used by Windows operating system; it was further developed and now can…

RED have become a very influential and respected digital camera brand, especially in Hollywood with RED camera equipment being used in the majority of Hollywood films productions. Spiderman, Pirates of The Carribbean, Resident Evil: Retribution, The Hobbit, are just a few recent productions that have utilised RED digital camera equipment…

In the world we live in today it is really quite difficult to imagine how a large amount of society would function without the use of mobile technology. Of course before this kind of communication rocketed in its popularity many used to rely on their traditional telephones. As hard as…
For those who were worried about falling behind in the app game with Windows 8, there is little reason to be concerned anymore. After a deal announced today between BlueStacks, a software developer, and chip maker AMD, half a million Android apps will now be available on the Windows…

Today’s business drives through online and the internet, social media and mobile revolution have changed our lives since past few years. Our world is becoming more compact.Everything is easily available through a couple of clicks.Google has provided an OS platform called “ANDROID” and organized a store “Google play” where you…

Start Making Money From Your Online Videos with Vimeo Vimeo has grown in popularity and now has a solid reputation as one of the largest creative video sharing networks, reaching a global audience of more than 75 million visitors. Over the years it has proved a great way for…

Nowadays, a phenomenal number of people living in the UK own a smartphone – 2011 figures estimated that around quarter of all UK adults and half of teenagers owned one, and they’ve now become such a way of life that many would be lost without theirs. If you own a smartphone…
Once again Microsoft has caused a commotion in the tech world foreshadowing that the new Internet Explorer 10 will entail the Do Not Track as a default setting. The presage has got the audience divided into the ones applauding the news and the skeptic ones who see the cracks and…

There are a lot of football (soccer) apps available for your iPhone, so how will you know what are the best ones to download. Below is the list of football apps for your iPhone The Best For News: ESPNsoccernet The ESPNsoccernet is an extremely comprehensive, yet slick iteration of the…

Consumer electronics giant Apple successfully sued rival Samsung this week over smartphone patents, driving market shares to a new high and compelling Samsung to pay $1 billion in damages. The lawsuit is far from over, of course. Samsung will appeal the decision, since any legal defense is better than a…

With over 600,000 apps, the iTunes Marketplace is a wee-bit crowded. If you are like me, then you might be sick of the endless parade of apps that are just another tired play on bursting bubbles, or flinging animals through the air. The sad truth about the iTunes App Store…
Top 5 Tips to Effectively Use Google Alerts Like a Pro Now you can use Google Alerts to your advantage depending on your needs and what you want to be notified of, whether it is brand, trends content distribution and back linking opportunities. There are so many uses, benefits and…

It goes without mention that mobile text messaging technology is one of the most advanced forms of digital communication technology used across the globe today, but why does it have to be 160 characters when you send messages to others? Many people have lodged complaints and requests with mobile service…
Whether you are working at home or in an office, maybe even just surfing the web on your day off, the last thing you want is your computer dying on you in the middle of something important. Fluctuations in power can harm your computer in the long run, and sudden…

I’m really happy to announce that www.pcpedia.blogspot.com has got a new name i.e bleepingtech.com. I have moved it from blogspot to wordpress. Its been a very good journey with blogspot but with plans to expand the blog in future, wordpress was the best option. My friend and a fellow blogger…

Apple recently released its iOS 6 operating system for just about every iPhone user out there. It’s a nice surprise for iPhone users because they get to experience the newest version of the software without having to buy the new iPhone 5.The new iPhone 5 is a great device, but…

With plenty of reasons to love WordPress, plugins are some of the big ones. The best thing about wordpress plugins is their ability to add a million (okay, maybe not a million persay) different options to your website, and it is completely free. There are plugins that are available for…

Custom About Author WordPress Plugin Would you like display a unique author bio on a per post author or an a post basis? To make things more simpler, lets say a content writer submits an article for your blog and the writer wants to display a link pointing to his/her…

How Big Is The Internet? [Infographic] The Internet is one of the most powerful forces in the world of technology. With the Internet, it’s possible to gain access to the total sum of all human knowledge. While the Internet can be daunting to use, it’s often possible to access information…

Travelling may be a hobby, profession or for business purpose. It fills us with new energy and spirit. When you plan for travelling to an unknown destination,it will requiremany preparations.Today technology has given a handy solution for our travelling. Google brings many free applications for travelling which offers detailed information…

Move over iPhone, a new competitor has stepped into the ring. Just over 3 months after being released, the Samsung Galaxy S3 has reached 20 million sales. This new version of the Galaxy has greatly increased in popularity from the Galaxy S2 model, and boasts intuitive features that are “designed…

So it’s 2012 and your website doesn’t have a responsive design. In that case you probably should be aware that approximately 20% of all internet traffic is from mobile devices such as smart phones and tablets. In fact, over 55% of all cell phone users have phones with internet access. If your…

What do you usually use your iPad or iPhone for? Work? Yes. Talking to people? Yes. Surfing the internet? Yes. Listening to music? Yes. Okay, that’s fine for a normal person. But for a gamer like me, an iPhone or an iPad without any games is a sin. Yes, you…

Backup is important in case your iPhone crashes. If you have not backed up your data, files and information, you could end up losing so much that is irretrievable. There are a number of iPhone back up apps that allow you to store your data and information remotely. New backup apps are constantly…

When you plan on making a website, the most probable question you will have on your mind will be regarding the development method of your website. While this may have been a job, only for those with technical knowledge, it can now be done by anyone with the help of…

So, you’ve got a Business Blog, now what? Not sure what to write? Not sure why your should be writing? Your business blog is one of the most powerful tools you have to promote your business online, but only if you do it right. Here’s five tips to get more…

Mobile application always attracts smart phone lovers. Now a day’s people are crazy about mobile apps. Here are so many types of mobile apps like business apps, utility apps, notification apps and gaming apps. Genuine battery booster apps are different from the above mentioned apps as it powered your entire…

Top 3 Best Gaming Laptops When it comes to laptop gaming, graphics processing units (GPUs, or video cards) are the laptop parts you should be looking at. Sure, CPUs are usually the go-to laptop components when measuring a laptop’s prowess, but they handle the “behind-the-scenes math” data crunching responsible for…

Google Blocked My IP Temporarily While trying to research on a particular topic on Chrome,I got a an unusual error message which in the first place freaked me out.I thought it could be a possible error with the website but i got the same message when i searched something on…

You already listen to music whilst you workout, so why not get jiggy with your favourite tunes whilst you swim! The question is: Is it cool and totally innovative or is it just plain crazy? Check our collection of awesome waterproof accessories that will save your smartphone from drowning. Whether…

Punch Tab is a loyalty program that will encourage people to visit your site or blog every single day.So what’s the trick behind this awesome program? Why it will force users to visit your site everyday.Does lots and lots of question pop up in your mind? I won’t be surprised…
How To Turn Your iMac Into a Touchscreen Apple has revolutionized the world of touch-screens. Their iPod Touch, iPhone and iPad today synonymous with touch screen but their legendary iMac all-in-one PC do not offer this option so they are far behind from the competition of the milieu PC. TMDTouch…
Are you spending more time managing your business than looking for new leads or interacting with your customers? Is your growing mound of paperwork becoming a burden, decreasing rather than increasing your operation’s effectiveness? Do you have real-time access to complete customer information from wherever and whenever you need it?…

Mobile advertising is the new era challenging big banner ads and flashy TV jingles. This form of advertising will take the industry with a sweeping force, touching and reaching the customers wherever they go. New companies that have recognized the presence of mobile advertising are already commanding enough respect that they are…

Whether you are a car fanatic or just an average car owner there are Smartphone apps that will make automobile ownership much easier and more fun. From apps related to auto insurance to traffic and fuel, there are plenty of tools out there for everyone. Here are seven apps…
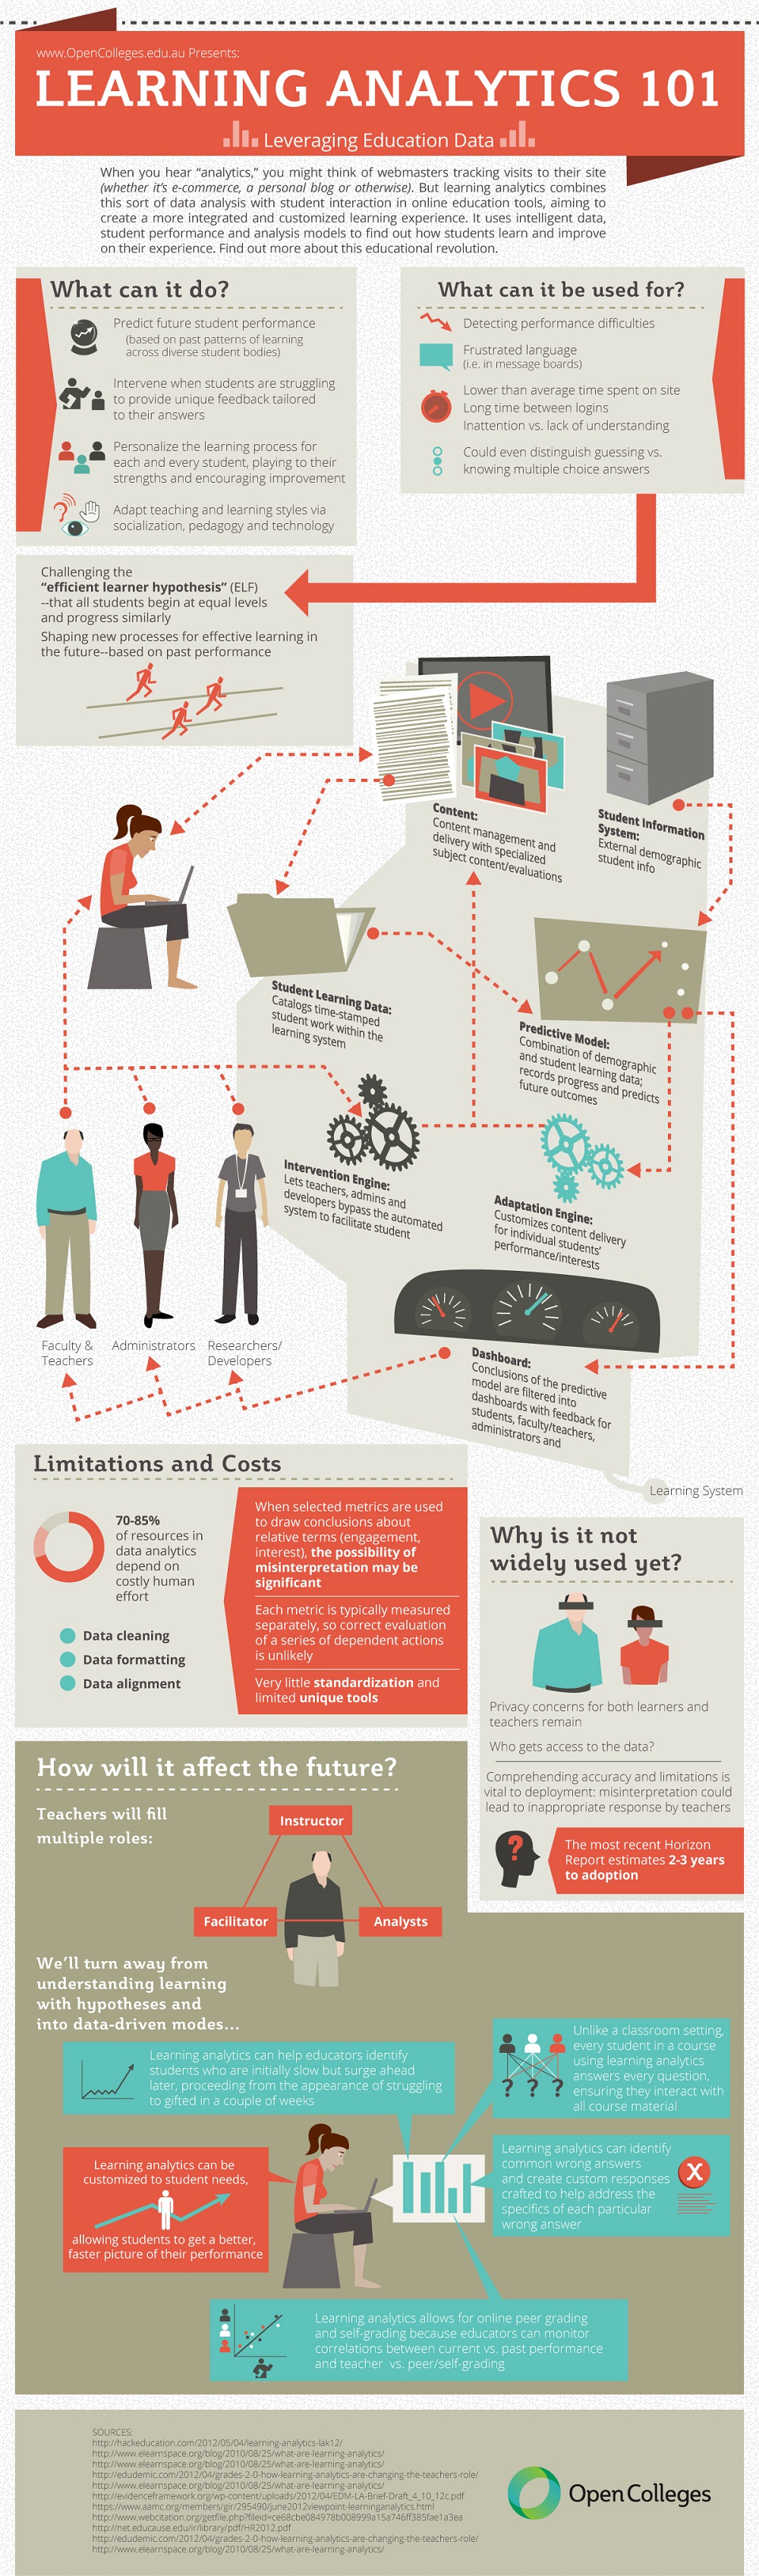
The term learning analytics may seem confusing at first, but when put in the context of the online world it tends to make quite a bit of sense – and intrigue the minds of people who want to know more about the future of teaching. Learning analytics refers to the…

Your important information saved in computer can be a victim of spam anytime. In such condition, you will not have access to your data and it will become a memory of the past. I’m sure that you would not like to be in such condition. So taking backup of your…

For those who jump into the blogging world, they may find they have more options than they were expecting in terms of the different blog platforms. Although there are probably about half a dozen good platforms out there that I could name off the top of my head, the first…

Wireless Network Security – Prevent Hijacking So you’ve been surfing the internet today and it’s likely never occurred to you who else is surfing alongside you. The risks internet users carry when they use Wi-Fi should not be taken lightly. They’re all fairly common and can be quite dangerous in…

Facebook is the world’s largest social networking site with more than 800 million users. If used smartly then you can have millions of potential costumer for your product/services. Now it harder for business to promote Facebook. So, if you want to promote your business over Facebook then the method is…

The latest decision about Apple-Samsung patent trial has created waves in the technology world. The official responses from both sides are adding more fuel to the already heated up the atmosphere. Apple says, it’s a great decision to help some great cause, but Samsung is giving some snarky response against…

40% Off On HostGator Web Hosting PLUS Free WordPress Installation! Great News! Starting today you will get 40% discount on Hostgator hosting packages on both Linux and Windows Hosting. Their rates are really affordable and until this 31st August 2012 you can start a new blog for as low as $2.97 a month!…
If your family is like most families today, everyone is going in a different direction all of the time. Schedules become crossed and appointments become stacked one on top of another. The worst part of having such a hectic schedule is that you may lose track of where everyone is…

It’s wonderful to get out and explore nature. However, that doesn’t mean that you have to leave your favorite pieces of technology behind. Just like you want your cell phone to work no matter where you are, it would be very convenient to access the Internet anywhere, as well. Unfortunately,…

Technology has really taken a swing for the “wow” over the past few years. There is constantly a new gadget coming to the world of consumers and some are just jaw-droppingly cool. Some would argue that some technology is only as popular as the big companies make it to be;…

Android is one of the only operating systems out there that introduces updates faster than tech companies can keep up. Would you believe that a majority of the market is still running Android 2.3 Gingerbread when Android 4.0 and Android 4.1 have already been released at different times? While that…
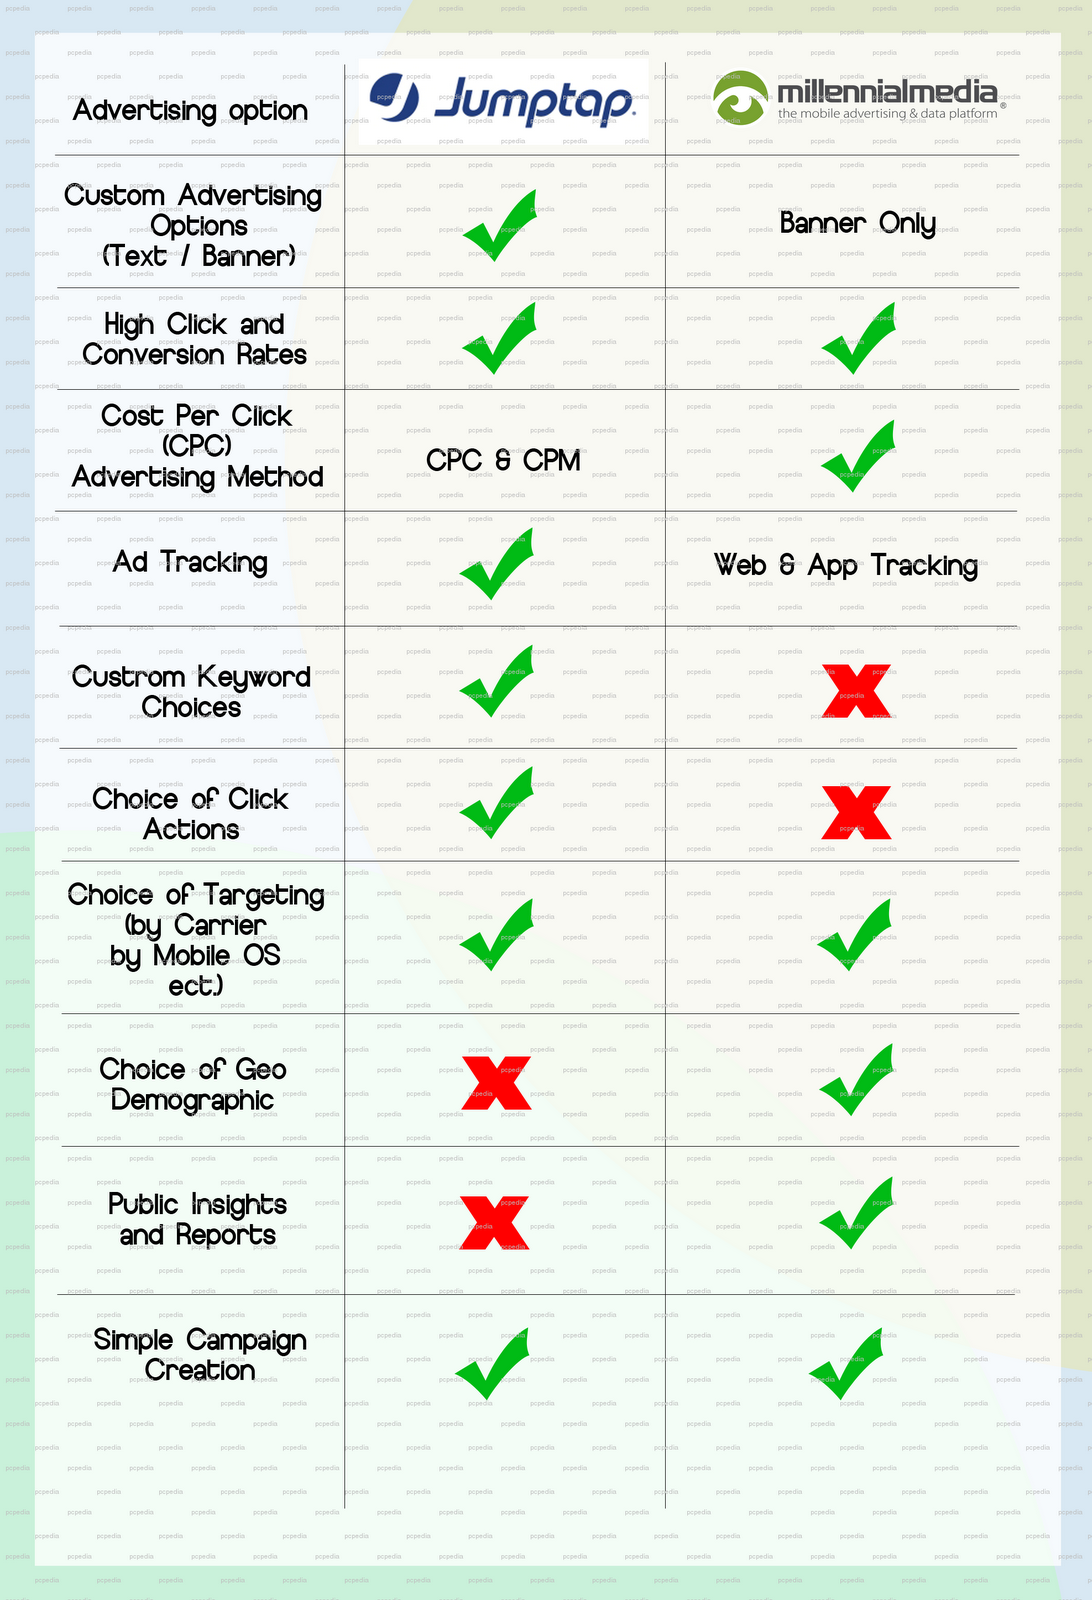
Jumptap Vs Millennial Media The use of Smartphones and Tablets is currently on the rise and with many more mobile devices being released at affordable prices (like the Nexus7 for example) there’s no stopping it! Advertisers and businesses are also taking notice of the world domination of mobile devices and…
Please don’t choose Hostgator. Their service sucks. You will get constant warning and suspension threats for CPU usage. Their uptime is great but its not worth it. Go for A Small Orange. BleepingTech is hosted on ASO and it works like a charm. Is Hostgator Any Good? Worlds most…

The tablet computer market has grown 300% in little over a year. 20 million people owned tablets in 2011, at the end of 2012 that number is projected to be over 60 million. Tablet sales are growing ten times faster than the sales of smartphones. Also, in 2011, retailers reported…

With so many tablet computers on the market, knowing which one to choose is something of a challenge. You may have your heart set on a stylish iPad or even one of the latest Samsung Galaxy Tabs, or perhaps you simply want a tablet that does the basics without worrying…

Mac vs PC; an ongoing battle which never fails to create discussion and conflict amongst tech-savvy creatives. Well, that’s taking into account the opinions of photographers, film editors and journalists from around the world. From my perspective however, as the owner of a graphics company, there can only be one winner. Step forward the lady in…
Imagine a supermarket, where everything is available to everyone and you can walk up and down aisles, choosing what you like, discarding what you don’t need and replenishing your shopping cart. Now imagine this for the internet. What if you could add services and sites you liked with a touch…

Cloud storage seems to be the modern trend in technology when it comes to sharing and synchronizing huge contents of digital data. These contents are stored online so that it can be accessed anytime anywhere. So what makes a modern user switch to cloud storage to store his digital belongings?…

You know you can never go wrong with a Datamancer steampunk laptop. It’s every gamer’s dream unit, and for some the dream is a very enviable reality. Take a look, for example, at this latest version of uber-funky laptops donned in brass and gold. At first glance, it looks more…
Doing business online these days is not complete without utilizing the opportunities available with social networking sites. Don’t get it wrong, search engines are still absolutely relevant, but the emergence and widespread of social media has created even better opportunities for business promotions and webpage optimization. Without doubt,facebook is on top of…

Okay, so maybe these girlfriends aren’t going to provide a deep, lasting connection, but when it comes to bragging to your friends, quantity can often beat out quality. If you are one of those men who are tired of your buddies constantly pestering you about your social life- or lack…

Higher website traffic means more potential business leads and Social Media stands to be an abundant source for the same. A newer network on the block of Social Media is Google+ which has so much to offer. The below listed five ways let you use Google + as a handy…

Data and information is important to anyone who works with a computer. From banks to small businesses create thousands of documents, spreadsheets and databases storing them in a network or a computer hard drive. Backup is hardly the priority when business demands more of your time and output, and there…

As more and more companies are moving their IT into the cloud, and more freelancers start working from the comfort of their homes, the use of Gmail (or Gmail for Google Apps) for work is becoming more widespread. Now, Gmail is an awesome tool in itself, with Google Hangouts being…

Whether you want to lose weight, maintain weight, or attain better fitness all-around, you can now do it with the help of an iPhone app. There are iPhone apps to help you choose the right menu item at a restaurant as well. Here are 12 great iPhone apps to keep you…

Everyone knows that Google is by the far the most widely used search engine. Website owners who operate online businesses, therefore, spend a great deal of their time and energy competing for rankings on Google. This means they want their sites to show up as high as possible on Google’s…

First Impression: The LG Optimus L7 certainly looks different from the other L-style versions; the L7 is more angular and has a slight curve from back to front giving it a sleek appearance. The curve is also there for a reason, the handset when placed on any surface will look…

Android phones nowadays are coming with better features and have become so powerful that they can perform various tasks which were only the territory of computers and laptops. With the great powers however comes one another thing- low battery life! Android phone owners have become increasingly wary about…

Blog traffic tends to go down when you are not posting new content. If during a two-week vacation you publish no new posts on your blog, you might even lose some followers, for after all, readers have the option to choose from the millions of blogs around. Here are some…
If you haven’t yet learned about Kik, it’s about time to educate yourself. Kik is the latest in smartphone apps, and quite possibly the trendiest. The app is a cross-platform application for smartphones that delivers the basic function of instant messaging. You may be asking, “What’s the big deal?” Well,…

The business gadgets of 2012 are making instrumental strides in the way business people conduct business in both the office and the mobile work space. The iPad 2012, iPhone 4S and ASUS Prime Transformer Tablet all provide lightweight and powerful solutions for the mobile employee. The MakerBot Replicator printer provides…

Ever Imagined how does the internet work? Internet is made up of millions and millions of computers connected by different types of connections such as wireless,cables and phone lines.Every computer speaks their own language to communicate to other computers.Stuffs like email,chat,Youtube,Facebook wouldn’t have existed without the Internet. Its really hard…

Ah yes, Grasshopper, you consider yourself a master of the art of black hat SEO. Is it not time to consider the path you have taken? Anyone with even a basic grasp of the Harry Potter story knows that Lord Voldemort and Draco Malfoy have demonstrated beyond any reasonable question…

The Android operating system isn’t just for phones anymore. From the OUYAgame console and VIA APC small form factor desktop computer to the Nikon S800 smart camera that’s rumored to be coming out any day, Android is popping up on devices left and right. It makes sense. Smartphones already include…

Who is Guy Kawasaki? Guy Kawasaki is a best selling author, successful entrepreneur, venture capitalist, popular blogger and public speaker on start-ups and small business.He is the author of some of the best sellers :Read more about Guy Kawasaki. Here is his Official Bio. Guy Kawasaki was the chief evangelist of Apple. He is…

Do you find that despite numerous attempts that preparing and following a budget plan has always turned out to be a troublesome task? You need to manage so many things such as maintaining a record of your purchases, saving the receipts; tracking your expenses and calculating you total expenditure as…

If you can convert your visitors into subscribers, you have more chance to generate sales for your product. It is known that email marketing is one of the most effective ways to promote any product to your audience. Thus, it will give you better conversion than using normal marketing method,…

New app from Casio uses flashing lights to send messages or in other words Shares Data Via Light – but they’d better be short For years the name Casio has found its place predominantly printed on the top of calculators in exam halls, but that’s not exactly the fondest of memories and…

Join in the world of augmented reality for an exciting and informative ride. You can get an app that can do pretty much whatever you want it to, on the move and on your screen. The possibilities are out there!Augmented reality is everywhere we look with technology bringing the virtual…

There are many automotive companies all over the world, but not all of them are particularly good when it comes to providing suitable after sales services. Honda is definitely one of the better brands when it comes to after sales installation help and customer support. When dealing with issues that…

Since the Oculus Rift Virtual Reality headset is presented at the kickstarter, they have so far collected about $ 1.3 million investment, which significantly exceeded the required $ 250 000 as a team from the company Oculus supposed to start serial production. Oculus Rift Virtual Reality headset represents a “VR…

Printers are available from Dell and other global makers at very affordable prices today, and they are widely used either at home or in offices. However, just like any other hardware, a printer can breakdown. Your printer won’t always function the way it is designed to work. When you get…

An SEO contest is one in which the organizers choose a keyword or keyphrase that has never been used online before. The challenge to the contestants is to get their sites to the top of the search results for this unusual word or phrase. Since the phrase being optimized for…

Creating Fake Facebook Conversation or Faking a Conversation using Fakeconvos Everyone on Facebook tries their best to create a unique status update that would get them more likes,comments etc.Recently on pcpedia an article on “Update Facebook Status Via Device” where you can update your status using fake iPhone,iPad,Blackberry etc. In…

You live your life by the mantra ‘I create, therefore I am’. You personalize and embellish everything you own and need apps to help you do the same in your digital life. A compulsive maker and doer, you’re ‘the arty one’ in your circle of friends. Keep your creative juices…
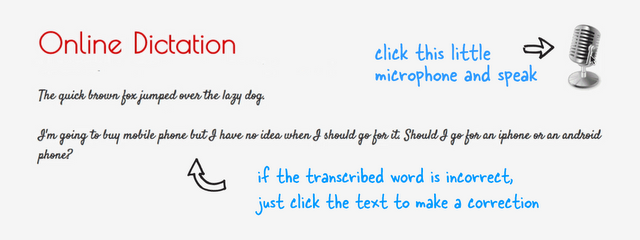
Google’s speech recognition search is already a hit.If you notice the right search bar on pcpedia you find that it has a microphone option. You can just click on the mic icon and search for the desired content.This feature was limited to search boxes. The Indian blogger who inspired me…

Google owns all Blogspot blogs.They have the right to delete or suspended it without notice, as its hosted on their servers.Now easily backup your entire blog with an easy to use software ‘blogger backup’.All your posts can be downloaded on your computer in no time. I have read so many threads in…

Bloggers are constantly searching for High PR social bookmarking sites so that they can submit their links and reap benefits.Do follow links help to increase Google Page Rank.Social bookmarking also plays an important role in SEO. (Search Engine Optimization). A Freshly updated list would really help everyone i believe.The below list includes Do…
Amazing Ads on the Internet Internet pages were once plastered with banner advertisements. Can you remember how annoying those blinking things could be? Can you recall a single product that was featured in any of the ads that you saw? Probably not! Although banner ads use is diminishing and they’re…

Human nature leads society to assign blame whenever problems arise so that people can better cope with issues and focus on ways to solve problems. In recent decades, the obesity epidemic has spread from adults to children, and the rise of television and computer use coincides perfectly with that timetable.…

Is Facebook Launching its Own SmartPhone “Facebook is going to charge the users for using their site”, “Facebook is selling users’ personal data to make money”, “Facebook is coming up with a search engine service”, “Facebook is going to launch a music company” and now joining the ever-growing list of…

Transform Your Garage Using Cool Decorative Stickers Ever wanted to give a fresh new look to your Garage ?.I’m sure most of us have tried but still it looks so dull. Garage is the only place that most people don’t bother.Its always filled with lots and lots of goods that…

There has been a lot of hype about the benefits your blog and website can get from Guest Posting, and with reason. It is a great way to gain traffic and SEO benefits, and is relatively easy to do if you have good content to share. There has been a…

[Solution] Fix Google Drive Installation Error 1603 The two most common errors while installing Google drive :The installer encountered error 1603: Fatal error during installation And Module: C:\Program Files\Google\Drive\googledrivesync32.dll failed to register. Even i encountered this error initially and after doing some research i found a 100% working solution. What is Google Drive? Google Drive is…

Top 5 Apps to Follow Olympics 2012 Here’s the list of top 5 mobile apps for London Olympics 2012: Olympics 2012 (Android) The Windows Phone app for the 30th Olympiad in London is really neat. On the top is a countdown to Olympic Games 2012. The schedule can…

In the past, iPhone users were able to brag about the superior quality of applications only available for IOS. However, Android users can now rejoice because many of the best applications are now available for both operating systems. Now that the Android market has nearly caught up to Apple, smartphone…

Building and establishing a brand and a following is not an easy task. Every time you turn around, someone else is doing it different and has been at it longer. But, building a social media presence is very possible, and can be highly successfulIt might take some time, and some…

How To Make Sure You Don’t Get Scammed When searching the internet for opportunities to make money from home, it is important to keep in mind that scams and scammers are everywhere. There are many sites and businesses that really do provide excellent opportunities for people interested in working from…

While the way we conduct business may have changed a lot over the last ten years, the basic principles of business remain the same. For your business to succeed, you need a solid marketing strategy. Whether that marketing is based on traditional methods such as direct mail, or twists on…

You don’t have to spend long on an affiliate forum before you’ll find someone spamming their latest get rich quick scheme. Sadly, in the minds of the general public, there’s no difference between “get rich quick” and “work from home”. To someone that’s never tried to make a serious income…

Having the opportunity to work from home might sound like a dream come true, but the reality is that working from home can involve long hours and hard work. It can also be incredibly isolating. If you see a work from home advertisement that promises high pay for minimal hours,…
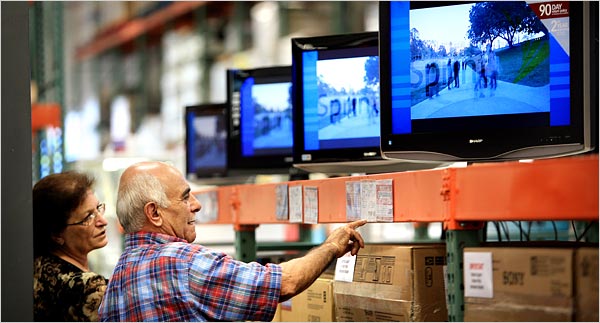
Whether your previous television was no longer in style, or you moved into your own place and left your old television at your parent’s house, before you rush out and purchase a television, there are considerations to bear in mind when purchasing a television. While you may be worried about…

On Kennedy Space Center’s 50th birthday, Google released the street view of Kennedy Space Center.Its is the largest and special Street View Collection till date. I am in love with the street view since it was launched. Now we have more reasons to excited about. “Countless enthusiasts (including this one)…

In today’s technologically advanced world it is difficult to imagine life without a laptop or desktop, and laptops from Dell, HP and other manufacturers are available with high performance and great features. In fact, portability being of utmost importance has forced everyone, from students to business associates, to upgrade to…

When Galaxy Note was launched, it did two things: • It brought back the Stylus, which had not been extremely popular in its first appearance• It brought out a mobile device that was bigger than a phone and smaller than a tablet. They called it a ‘bridge’ between the two.…

How To Use Twilk.com For Free Twilk Team made it really easy to create twitter backgrounds featuring all your followers in less than 5 minutes. A twitter profile that looks creative are more likely to gain more followers. You never know your twitter profile may feature in some of the top blogs on…
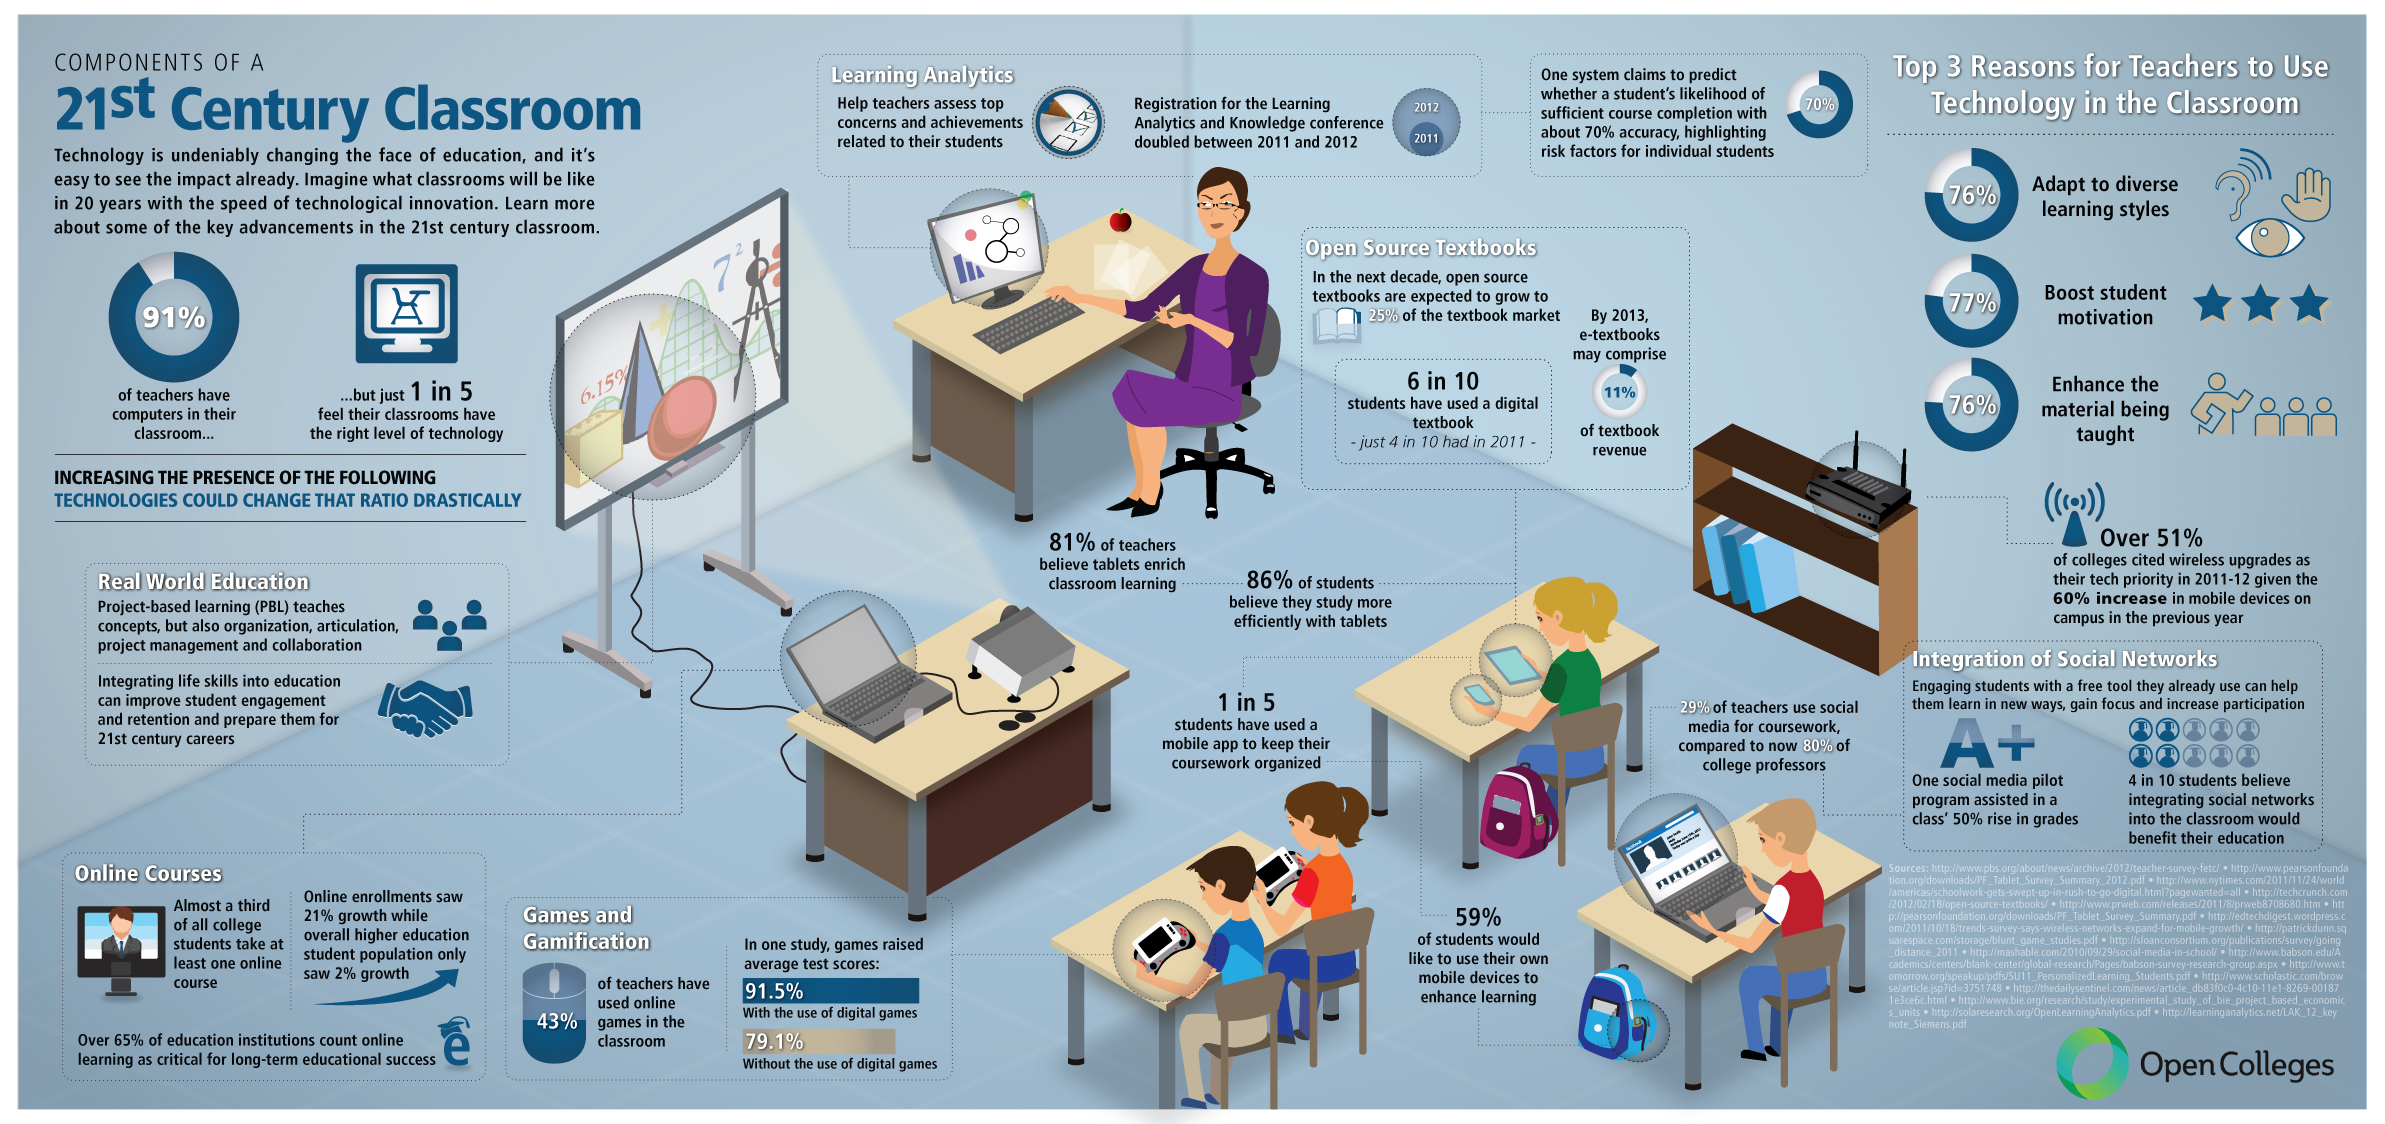
As technology continues to sky rocket into the modern world, many people remain amazed at the innovations that have been afforded to society through this continually evolving science. The first tablet was released only a few years back and already it has transformed so many parts of daily life, including…

The quality of links which you have to accumulate is getting more and more crucial nowadays, especially with the constant algorithm updates implemented by Google. If you just go around picking up links from various sites without even checking their credibility as well as relevance towards your site, then without…

Gone are the days when our cell phones carried a huge keypad. All the latest gadgets in the market these days are boasting of touch screen monitors. Be it your cell phone or your tablets and readers, everything is touch based. Touch screen monitors have been able to grab the…

Earning money is the first thing that comes to the mind of most people once the internet is mentioned. This is why keywords like “how to make money online” will continue to be one of the most searched terms on Google. It’s understandable that not everyone is ready to dedicate…

In the world of gaming laptops, there are two choices – a 15-inch screen or a 17-inch screen. Other smaller sizes are irrelevant because gamers want the best, and to get the best, you need to go big.What about you? If you’re considering a gaming laptop, you might want to weigh…

SECURITY AT THE GAMES VS HEATHROW While many people may complain about the queues into passport control and the hassle of throwing away your liquids and packing and unpacking your bags, the London Olympics can give passport control at Heathrow a run for its money. We compare gaining entrance at…

Did you know whenever you search for something the site you go to gets the search terms you used to find the site and automatically saves them? Almost every site does this, because it helps webmasters know why people are coming to their site. This isn’t an invasion of privacy, but people…

Getting on the “most popular” list is one of the best ways of gaining social recognition when using Instagram. This may even earn you a recognition message from the makers of Instagram which will help you get more followers. Here are some of the tips which I happen to think…

The internet can be a very complicated and stressful thing, but it does not have to be. This is especially true when it comes to having a slow internet connection, and not knowing why. There are numerous ways in which you can speed up your internet connection. some of them…

The online gaming world can be a very confusing world for any newcomer, but there are ways to do it right. The trouble with online gaming, is that the games are hard and the people you are playing with tend to be very critical when it seems like someone does…

Every time that it is announced that the Microsoft Corporation is coming out with a new version of its flagship operating system, Windows, people become intrigued. This is because Windows has been the primary personal computer operating system for most computer users around the world. Sure, Apple may give them…

The way you design your site has a lot to do with keeping visitors on your pages. If you do it right, you will give people extra reasons to come back to your website. However, if your site design is sub-par you may risk losing visitors and potential customers.When you…

The Microsoft Windows program has many options available to it. There is a good reason why Windows is as popular as it is, and one of the big reasons among many techies and computer enthusiasts is the amount of tweaks and customizations that can be done to the Microsoft…

Google’s latest update to its search algorithm is called Panda. To prevent any kind of over optimization penalties from harming your search engine optimization efforts, read ahead. These link building tips are taken from the best practices of bloggers from all over the world and should work well enough with…

Google has managed to arrange with the Italian government to put on the Internet more than 30,000 articles and various documents of Mussolini’s rule. Materials, which mainly praised his fascist dictatorship, Google will assign Istituto Luce, Cinecittà. The main contents of their archive are short films by the Istituto Luce,…
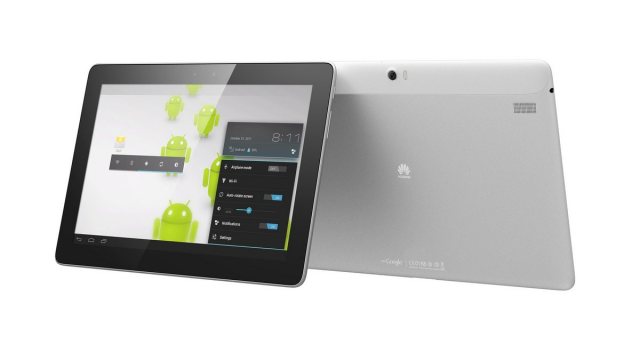
That’s what everyone’s calling it. Are they right? It’s a strong possibility! Unfortunately, what hurts Huawei the most is its infant status on the technology market. The new guy in the school always has a hard time gaining respect and friends, especially when you’re up against one of the coolest…

Whilst people have been tinkering in their sheds attempting to create robots to serve all manner of purposes since the early seventies and eighties, it was in the 90s that amateur robotics really took off. The arrival of the TV show Robot Wars inspired hundreds of amateur engineers and electronics…

When a person looks into the tablet market, they find that there are quite a few options. With these options, you will find that the biggest contenders tend to either be android tablets or the ones produced by Apple. While some people will only go with items that Apple produces,…

Top 5 iPhone Travel Apps Summer is truly here, which mean ironically that it’s time to start thinking about where to go ‘boarding or skiing if you’re a winter sports addict. There are a number of quality apps available to use before and during your winter ski holiday. We…

Nowadays, technology is really superior as it is. Imagine needing to send a file saved in your computer in the office but you are already at the comforts of your home. In this day and age, you do not need to rush back to your office to finish your job.…

Wireless broadband is quoted by a lot of the Internet Service Providers or ISPs who suggest it as the finest thing as a pizza can be transported at the click of a key by means of online shopping. It is, certainly, a very helpful service. What it is, why it’s…

Like any other business, social media plays a crucial role in the real estate world. Though you may find yourself trying to succeed in Facebook, you may find that you could benefit from other, more professional social media channels that are available to you as a real estate agent. To…
One of the most important, but often neglected tasks that a computer owner should perform is data backup. There are many reasons that computer users do not backup files on their computers. Some of them are: • PC backup is too hard; I really don’t know how to do it.•…

Who doesn’t love a good card game? Whether you’re looking for something to keep the kids occupied or a fun way to kill some time in a waiting room, the perfect card game is out there. All you have to do is find it. And with mobile apps, it just…

[box style=”info”]Facebook Tips and Tricks That You Might Not Know[/box] Facebook is an excellent way to keep in touch with friends and family as well as make new friends that share your interests. It can be overwhelming when you first sign in, though, especially if you’re not familiar with social…

If you’re using Facebook as a marketing tool for your business or blog then you already know how valuable it can be. That said, there’s a good chance you aren’t taking full advantage of Facebook. Your business or blog deserves the best marketing you can muster, and there are a…

Our increasing reliance on the Internet has pervaded every corner of our lives, from socializing to reading, research, entertainment, business operations, and more. With the Internet so important to so many aspects of our daily existence, it is imperative to have a fast, reliable connection that keeps us connected to…

Most coffee shops have free wireless Internet, but are the wireless Internet connections safe? It may not be as important if you just use your computer for looking at websites, but using an unsafe connection can make it easy for hackers to peek into your computer and see what you…

Studying your Facebook helps others rate your Big 5 According to one study, Facebook may be a better indicator of what type of employee you might be than an IQ test. Perspective employers may be checking out your Facebook profile before deciding what type of candidate you might be for…

My friends are always sending me pictures via email, trying to convince me how relaxing camping is. Sure, the outdoors can be beautiful, but my idea of relaxing isn’t a closer relationship with Mother Nature and mosquitoes. I need more motivation if I have to trade my lasagna and leather…

People spend hours each day using electronic devices of all types. It may surprise some, but the use of computers and IPhones among the visually impaired has increased over the past two decades, just as their use among the general population has increased. Today, there are many apps that…

Everybody’s heard the stories – the internet is full of them, the hotshot kid who came from nowhere and used their innovative new blog and social media acumen to bring themselves to the attention of the best in the business, who then hired them on the spot. It’s an old…
Pinterest is rapidly becoming the next best social media tool to make your business a success. Though it has yet to reign in as many users as the social media giants that are Facebook and Twitter, Pinterest is the new and fresh way to get your brand out there.…

A POS system will allow you to complete customer transactions – and fast. But thanks to the latest technologies in POS systems today, they can do way more than that. Before you start looking for your next business POS system, it’s important that you consider what features you want your…
New movies and premier shows have changed the way the whole world thinks about their clothes, gadgets and even the shoes they wear. All the accessories have to be according to the matching styles and the designs matching their favorite actor or actress in any movie they all like. Nowadays,…

Did you ever wanted to send emails to all your subscribers at one go? If yes, then the first question is on “How to get email addresses of your FeedBurner subscribers“. Well its pretty simple to do so. You don’t need any special tools to find it. In-fact we have this option in…

The company bearing a fruit’s name is back with yet another innovation. Yes, the new MacBook Pro from Apple has stunning display quality that a notebook computer can ever be equipped with. Named ‘Retina Display’, this technology is bound to be a visual treat.The MacBook is a family of notebook…

Mobile is having a tremendous impact on the way the world operates. With the emergence of smartphone usage, more mobile activity is being conducted now more than ever. In this infographic designed by Trinity Digital Marketing – a DC Graphic Design Agency, we see just how mobile is changing everything.…

When your loved ones relocate abroad (for studies, work opportunities or new residence) virtual communication is often required to stay in touch. Social websites, video chats, sharing pictures and chatting online are all essential for long distance communication. Have you ever thought a third party was listening in or monitoring…

Now, more than ever, it’s easier to gather and track information about one’s finances. Instead of staring at long spreadsheets, the average person can now have all his financial data on a phone or mobile device for easy access. Plus, all your decisions will be based on data, not on…

Img Credit In today’s smartphone market, there are really only two players in town: Apple’s iPhone and Google’s Android based phones. Palm, the once proud PDA maker, made several attempts to enter the smartphone market with its line of webOS devices and fell on its face each time; in February…

A trivial answer of the question is that wireless broadband is broadband without wires, so if you have a wireless network in your home that uses a router than connects to your computers and other devices with Wi-Fi, then you are already using it, though really that is wireless networking. You…

Cloud computing is becoming a buzz word these days. Although cloud computing got some bad press in the last month because of the Amazon web service outage without doubt it is a fast growing industry. Lots of start-up and small business are taking advantage of them and lowering their costs.…
Best Google Chrome Security Extensions recommended by BleepingTech. Chrome is best known for its fast and secure internet browsing. But to unleash the full potential we need to equip the browser with some great add-ons. Today I have decided to post some of my favorite security add-ons for Chrome. Here…

Though Internet brings the world to your hands, a common problem that many encounter is the inconsistency with internet speeds. You might have encountered scenarios where you have to sit passive until a page gets loaded, movies take hours (probably a whole day or overnight) to get downloaded and videos…

After investing in your business’ website design and content, you will still need to get people there. A great way of attracting visitors is by spending some time on a good email marketing campaign. Img Credit The first thing to do is to sit down and make a plan that…

Quora is a serious social media website from which you can get a variety of great answers. Quora has strict guidelines for users to follow, and tight monitors and moderators. However you’re rewarded with credits when people vote up your answers. Quora is not a spam website where you can…

Okay so you’ve bought your domain/hosting account, you have your content, and now you are ready to upload your website. Usually one would upload a website to their hosting account via an FTP (File Transfer Protocol) program. A File Transfer Protocol program provides a user friendly platform that one can…

Home wireless network is something that is widely in use. Most of the households have a wireless router that is connected to a cable modem through which Internet connection is shared. The signals that the routers transmit, dubbed as Wi-Fi, can be used by laptops, desktops, smartphones and many other…

For Apple fans, there’s nothing more mouth-watering than when Apple releases a new version of their beloved products. Out with old and in with the new, Apple is constantly revamping and updating its line of products that sell by the boatload.We saw the new iPad come out, the slightly updated…

Imagine a morning just after the floods have subsided, you reach your office and find that everything from the desks to the cabinets are drowned in knee-deep water. Worse, all your important papers and documents are floating atop, making it a miserable sight.At such a time, if your first question…
Kaspersky Lab has discovered some harmful Android applications, which have been acting as security software. Kaspersky has reported that this malware detected in Android applications is connected to the notorious Zues Trojan. They say that the tool acts like Android spyware and is commonly used to hack banking credentials. These…

Although the developers of CyanogenMod still did not get a chance to see the source code of Google’s new mobile operating system they have by Google + network shared their plans with their fans and customers of this modified operating system. The first news is that Jelly…

“Marketing your brand, business, or franchise on the internet can be a time consuming and complicated process. With all of the different social media platforms that exist today, it can be hard to decide what platforms your business should be a part of, and on which sites to focus your…

With Google’s constant updates and ever-changing webmaster guidelines, more and more businesses are ‘thinking outside of the box’ in terms of their marketing tactics.One way of spreading the word about their product or brand is viral marketing. For larger companies, this type of campaign is often handed over to advertising…

How to Update Facebook Status via any device? You might have seen your friends update facebook status via iPhone 5, Blackberry, iPhone 6 etc. How do they update facebook status via anything? Like from a device that they don’t have or from funny places etc. Its very simple you just have…

As a parent, technology is making it admittedly hard to look after children. A parent can do all the things that are required at home but when a child or teen steps into the realms of technology and web communication, they know no bounds. And though the Internet is supposed…

Hunt For The Fastest DNS Server Everyone loves to browse at lightening speed and wants web-pages to load in a fraction of a second.Which is not possible unless you have a high speed broadband connection at your place.Still if you want to take full advantage of your Internet Connection then you need…

How to Scan Your Facebook Profile ? Facebook is the worlds largest social networking site where you discover new and interesting things every day.There is no age for addiction likewise you will find people of all age groups addicted to Facebook.You will find people doing nothing but just checking funny pics,posting…

Location-based marketing is a fairly new concept that is fast gaining popularity because it has the potential to help you expand your business. A lot of businesses are wary of using this kind of concept because they don’t know enough about it, or don’t understand how to use it, but…
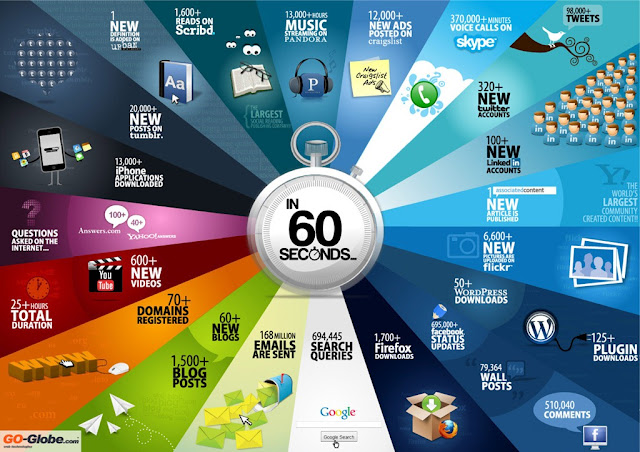
We all know that the Internet is a global system of connected computer networks; we also know that there are billions of users present in the world today. But how phenomenal has the growth of this wonderful invention been, and how much more is it likely to grow in the…

Facebook Forced timeline on everyone.I don’t believe that timeline would make the users happy and sure it has not .There are numerous groups of facebook such as “1 million “Likes” to get rid of FB’s new Timeline” who oppose it. But I would say there are many benefits of using…
Black Element Pro Gaming Mouse Cyclone Edition : Review Very interesting product from Thermaltake, the mouse called Black Element Pro Gaming Mouse Cyclone Edition is a truly interesting look. Given that the market already have gaming controllers with cooling, so the Thermaltake presented their reasons for thinking that it is…

Search engine optimization i.e. SEO is the technique of building your website rank among the topmost results of search engines. This has become the highly preferred technique for the companies to promote their business. Goods and services offered by a company to its targeted set of customers are being sold…

Have you just started your business? Do you want to make it productive? Well, if you want to make your business reach greater heights, it’s time that you consider venturing into Search Engine Optimization or SEO.Remember, the first step to making your business work is to package or brand it…

Many computer users look for SSL certifications, insist on the latest encryption algorithms and are overall very dedicated to IT security. However, most computer users exercise remarkably little care when choosing a password. If you’re still using the same password that you chose for your AOL account back in 1998,…

Without a doubt, iPhones are jam-packed with amazing features, latest operating systems and fast processors which make it a multi-functional device. Even with the advent of several new smartphone models from the leading manufacturers in the industry, Apple still maintains its share in the market with its features that is…

Google has finally taken the long awaited dive into the popular growing market of tablets with the announcement of the Nexus 7 tablet and has made a big splash doing so. Google has teamed up with computer hardware manufacturer Asus to design the first Google branded tablet. For Google fanatics,…

Tips To Improve Your iPhone’s Battery Every iPhone user finds it as a fascinating possession to one’s pocket. One can boast about its upgraded camera features, responsive talking voice assistance, gaming and more varied other unique features that define an iPhone. But there is still an area which makes us…

According to recent studies, website downtime can directly impact the reputation of a particular business or website. Customers have this tendency to think that your products and/or services would also be slow or ineffective as your site is and would hence look elsewhere instead. Basically, a bad site, can imply…
We all love Facebook, and more of us are starting to enjoy Google+ too. Social networking is now part of most people’s daily life, and it is rare to go a day without checking your notifications or seeing how many crops have withered on Farmville whilst you were at work.…

Microsoft is finally joining the bandwagon and producing its own line of tablet PCs. They are calling their product “Surface,”and this is one of the few times that they are developing their own hardware and software. According to their CEO, Steve Ballmer, “It embodies hardware and software working together.” This…

Owning a iPhone gives you the ability to access the amazing app store that Apple has built around the iPhone. This app store offers a wide variety of application from games to accounting to entertainment. Of all the applications the camera apps have to be some of the most popular,…
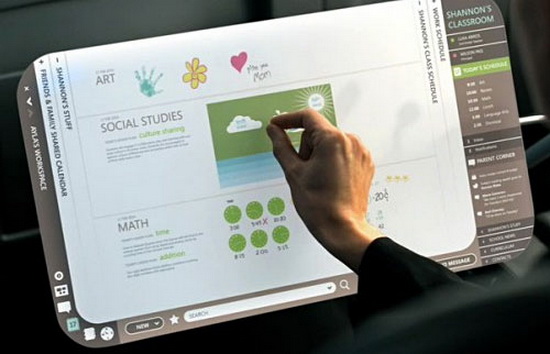
Touchscreens seem to be taking over the world of personal electronics. While many people just love touchscreen technology, many simply prefer the feel and functionality of physical buttons. It seems that there may soon be a new technology on the market that provides users with the best of both worlds.…

“DNS Lookup Failed” is quite common when you are using Google Chrome. This issue commonly arises when the settings are incorrectly configured or the DNS server stops responding. It’s always recommended to choose the Best DNS Servers for Your Computer. What does DNS Server Do? It translates domain names (eg: google.com…

uCertify has launched the online platform for their PrepKits which means you can take tests from anywhere on any device, including Mac, Android, iPad, etc. You need to have internet connection only. I was approched to review 1Z0-040 PrepKit and I did. The PrepKit has many more features like: •…

DNS servers are one of the most important component of Internet browsing but only few people really understand how it works .DNS stands for Domain Name System. The primary job of a DNS server is to translate the domain names like Facebook.com or Google.com to IP addresses example 192.168.1.1. You need to choose…

Red light cameras are popping up in various cities and towns in an effort to catch drivers who break the law. Luckily, there are ways that you can avoid these cameras if you are careful. It will be almost impossible to get out of a ticket if you are caught…
Facebook has finally shed off its old self and have moved on with a new layout that is getting so-so reviews from its hundreds of millions of users all over the globe. The current Facebook site looks just like the way it has after major changes and updates have been…

Many a times we call technical support and ask them to setup our ADSL2 modem but there are certain limitations for your ISP’s Tech support.Your Internet Service Provider (eg: Optus,Telstra,Bsnl ) will provide you full technical support on the modem supplied by them as they have all the resources to support…
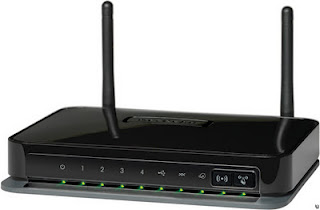
Trouble setting up your new Netgear modem.One of my friend in Australia got a Netgear modem from Optus (Internet service provider).He called me up to get some information on the setup. Then I thought why not write a post on the same. Steps you need to follow .…
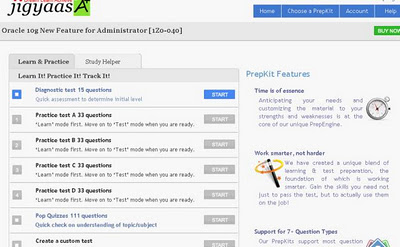
Recently uCertify approached me and asked me to write a review on about Oracle 10g: 1Z0-040 exam PrepKit. Since this is interesting, I agreed. uCertify produces the preparation kits for many different IT Certifications including Microsoft, Oracle, Cisco, CompTIA, Adobe, etc. The uCertify PrepEngine looks like this: Features of the…
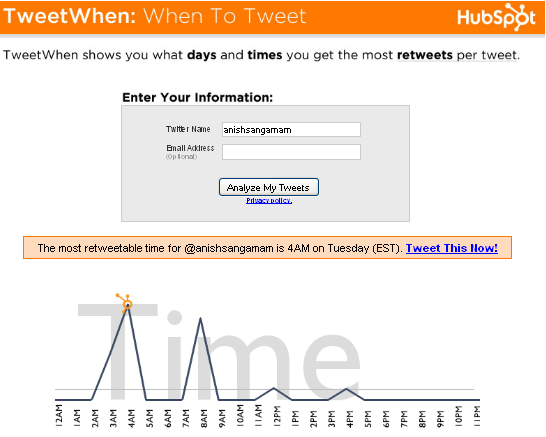
Timing your tweets is one of the best way to get most out of Twitter.Sending tweets at the wrong time will do no good for you. Half of the world is sleeping while you are awake and your tweets will be replaced by the latest ones hence nullifying the effect…
Have you ever come across a fake Facebook profile that pretend to be you or someone else or someone using your photos or representing a celebrity ,an organization. If that is the case then you have the full right to report the problem to Facebook as FB gives you the…

Have you ever come across a fake Facebook profile that pretend to be you or someone else or someone using your photos or representing a celebrity ,an organization. If that is the case then you have the full right to report the problem to Facebook as FB gives you the…

Ever wanted to know when your PC was last turned on by someone at home or office? Often there arises a situation when you desperately want to know the start up time, the reasons may be endless.Without using any software’s you can find it easily by just checking the system…
What is Ping Rate? Ping rate is the total time taken for the data to reach the server and then back to your system. Ping rate above 100ms is high. Ping is usually measured in milliseconds. Low ping is always preferable as high ping will ruin your gaming experience. This problem…
Many programs are needed in order to keep your computer running smoothly. Regular Windows registry cleaning and maintenance, regular device driver updates, and Internet Security and spyware protection are some of the programs that are necessary to keep your PC healthy, tuned up, fast, stable and also completely secure from…
Modern Windows PCs use a lot of device drivers that makes the hardware work with the sytem and makes the hardware faster and more efficient. The problem is that driver updates are like your car maintenance – they are absolutely necessary to keep a computer at its best. Computer users…

“Forums owners get posts, Forum posters Earn Cash” .I had written a post about Postloop on April 19th. After fully testing postloop I can give you the guarantee that it pays people for forum posting. They are emerging as one of the legit GPT sites and also the best way…

Need to have a website design for your business? In today’s age of technological advancements, having a web presence is undoubtedly the best way to create a corporate identity for your company. Being one of the most easy and cost effective option to bank on, every company, be it big…
The cost of an effective spyware protection program is dramatically lower than the cost of either buying a new computer or trying to fix your financial reputation in the case when your financial data is stolen due to spyware. Damage from malware, worms, phishing programs and trojans can hinder computer…
A PC needs a functional, clean registry in order to operate properly. Scanning, cleaning, optimizing and generally maintaining your Windows PC registry on a regular basis is analogous to doing your regular auto maintenance when you need new breaks or new tires or even windshield washer liquid for your car.…

The most widely used and peoples favorite browser “Firefox ” lacked one feature which is very essential.Yes the Speed Dial feature.First introduced by Opera which later other browsers copied.Firefox add-on make it possible so its another good news for the FF fans. Its fully customizable and offers a wide range…

Recently I read an article at Labnol.org where my favorite blogger Amit Agarwal had posted an article on How to fix Shaky Video with YouTube. I would like to share this with you all. Most videos shot at home or during a party are shaky this is because most of …

Toshiba announces new range of Hard Drives that will self destruct if it falls in wrong hands.This technique will allow greater security as it will erase all the data and won’t let others access your personal data.I’m eagerly waiting for it to launch. Here is the video from C net…

Bring life to your emails. Have you ever created an email signature having cool social media buttons, your photo,address,even Rss feed,disclaimer etc. Wisestamp has revolutionized signatures with wide range of possibilities. Even you can add HTML signatures in G-mail which is not allowed by default. Take a look at the…
Do

To enhance computer performance, there are guidelines that have been simplified for easy application on your computer. These guidelines will help you on how to improve pc working to achieve increase in speed as well as to keep it running efficiently. Here are the steps to enhance computer performance…
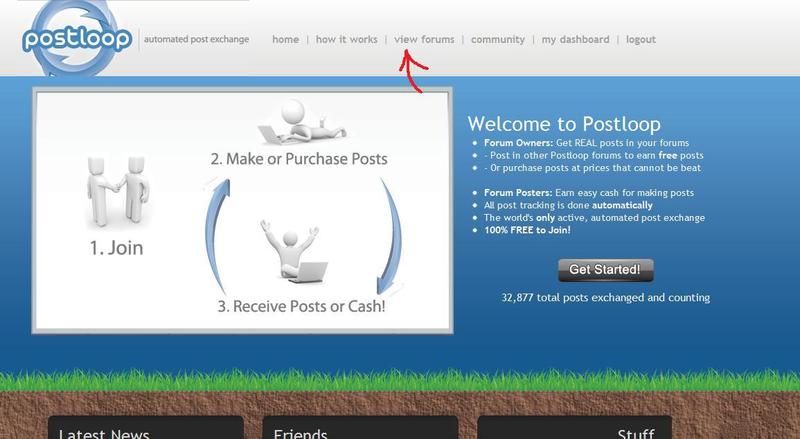
Nowadays there are endless opportunities to earn money online.People get money for creating profiles,creating emails ids,joining fan page,tweeting,bookmarking etc. So there are plenty of ways but its always essential to find the ones that really pay you. I had previously written an article about cashle which pays $1 per friend…

Create your own Google search story in a matter of minutes.Google had created a 60 sec ad made simply with some Google searches and people loved it so much that they launched a simple, easy to use video creation tool.Using this tool you can create mini movies.I don’t mean…

How to make Desktop 3D ? Download Bumptop Pro for free. BumpTop will turn your desktop into a 3D Desk.You will find that your desktop looks like a room with four walls,where you can hang pics,icons ,create a pile of icons,files etc.Its just like we do in real life.BumpTop allows…
The long wait is over.Firefox Fans its time to rejoice as the beast is out,Firefox 4 stable version is now released.The Release Candidate version 1was released on March 9th, 2011.I hope all known issues are fixed and the latest version is ready to rock. Firefox For Windows ( link for Firefox 4 removed) …

Duck my life.”Because every web page should have ducks you can shoot” I was just browsing through DigitalPoint and found an interesting thread started by EGS (Member).So,I thought of sharing with you all.This duck might irritate some people or some might even love it.The sound is actually funny. I have…

As Firefox RC1 received a warm response,the developers are aiming to release Firefox 4 on March 22nd.It should have been released with or before Internet Explorer 9 but unfortunately its delayed.IE 9 was released on March 14 ,9 PM PST. I read an article at Mozilla.dev Planning where Damon…

Internet Explorer 6 was released on August 27, 2001 and looks like Microsoft really want everyone to stop using IE6. Its been 10 years and still now people are using internet explorer 6 although the usage has decreased considerably.The below stats shows the recent usage of IE 6 around the…

Every blogger who tries to monetize their blog choose Google Adsense.The main reason is because Google Adsense pay higher than any other adsense competitors. But is adsense enough? Don’t you want to earn more.Well everyone wants to.One of the way is selling ad-space in your blog. BuySellAds is good but…

“A little bar that gets noticed” by the way did you notice a Hello-bar at the top?I’m currently promoting Cashle. also experimenting the conversion rate with Hello-Bar and i must say that the little bar is doing its work.It’s a neat way to promote your e-book,affiliate link,contest etc. Tracking feature…

Who Is Seth Godin? Seth Godin is an American Entrepreneur,Author and a Public Speaker.He is also known as The Best Selling Author.He is the Author of Ten Best Sellers around the world.Read more about Seth- Wiki. “The Ultimate Entrepreneur for the Information Age“ — By Business Week. …

A crappy old browser will make your website or blog look crappy.But the people visiting your website may not be aware that, it’s because of their outdated browser.So what is the solution to make people aware that they are still using the 10 year old Internet explorer 6 or any…

Do you want to tell your visitors or readers to stop using IE 6 or Outdated version of their browser.If really needed to tell them because an outdated version of any browser especially Internet Explorer 6 would make your website look crappy as it lacks so many features.Microsoft is on…
Firefox has released RC1 of Firefox 4.only Firefox fans would download it 😉 as they like getting the latest release first.I read this at labnol. The new features include new tab location,easier way to stay in sync,organizing tabs and managing add-on has become easy. Download Firefox RC1 for Windows,Mac,Linux (All…

Answer the guidelines quiz at Yahoo Answers and quickly get 20 points. The motive behind this quiz is to make people aware of the rules to be followed while asking questions or answering them.Chatting,Abusing,Affiliate links,asking someone to do your homework,sexual graphics etc are not allowed in Yahoo Answers. Yahoo has…

Looking for legit ways to earn? Then you have already found one.But its really hard to believe as we never know which affiliate program or survey really pay.Scams are everywhere.but the one i found is working. They have a forum where people interact and show the proof of their earnings.Even…

Today I really found something very interesting. Most of us are familiar with .co.cc free domain name registration service, but we are always looking for alternatives. Even I was looking out for free alternatives so today I found some free alternatives (domain name registration services and URL redirection services included…

Regular readers of PCPedia might have noticed that the last post was on February 26,and now I’m back with roundup post.The only reason for this irregularity is because of my exams which will commence on March24. So I thought of writing a roundup post on Blogger Tips & Tricks,Widgets etc. In…

Twitter is a powerful tool for social networking and also for promoting your work online,getting latest updates etc.You get to know about new people in the web-world.But to get benefit from twitter, you need to have followers,more the followers better is the result. Time for a disclaimer: This is not…
Are you a struggling blogger looking to earn money online, wasting hours researching for targeted keywords for you blog post title? It is said that if the right keywords are present in your headlines then you can get ranked to the top quickly.yes literally in hours. I would suggest you…

My last post was about yippr.com from where you can watch the most popular videos from multiple video sites like youtube,dailymotion,metacafe,yahoo.Today i’m back with another post which will help freelancers to earn money online. Freelancers are searching out new ways to earn money online.Fiverr.com was one such site where people…

This is my the first contest held by pcpedia and I’m happy to announce the winner.There were only two participants,well not bad i would say for my new blog.The winner is selected using Random.org and its recorded live.check out the video to find out Congratulations Fikazen!.And Better luck next…

Instant-e-store live chat enables website visitors to chat with the customer service agent on your website. This software is really useful for e-commerce website. Adding a live chat to a website helps build trust in the minds of the visitors. E-commerce , Web Hosting , VoIP, and similar websites…

First of all I’m really sorry for not updating the blog.I’m really busy with my studies.Exam’s are fast approaching a lot to study ;p.OK Lets come to the topic.I have found a free yet useful website analyzer tool -Mini Status that estimates you sites Search Engine Information Social Media Information…

Good News! Pcpedia has arranged a small give away of 500 Twitter followers.This is my first give away and i’m very happy about it.There will be only one Winner and no second place.Winner will get 500 followers in 10-15 days.The contest will run for 7 days. Contest Prize: 500 Twitter…

How to Make Perfect Unbreakable Passwords Do I need to explain the benefits of a strong password.everyone knows it why strong passwords are always recommended.A strong password must be a combination of letters,numbers,special characters.but the problem is how do i remember a password which has so many special characters,numbers…
How to Solve Blogger Fav Icon Problem in Firefox ? Once i noticed that the fav icon suddenly disappeared and the default blogger icon “B” appeared. I have seen people saying ” Favicon not showing up in firefox “, hence i wanted to solve this issue once and for…

It is very interesting to know the difference between SEO and SEM.But before we study about the difference, lets get to know what is SEO and SEM and its functions. SEO is Search Engine Optimization.It is a process for improving the visibility of a website or web page in the…

If you wish to delete your blogger blog permanently,there is an option in blogger to do so.Even if you delete your blog ,blogger gives you a chance to restore it within 90 days if you wish to.You can create another blog at this address using the Google Account you’re currently…
How to create a forum in blogger? This is the question most bloggers ask.There was no such option before, Bloggers use to create a forum and then link to their blogs.With Nabble you can embed a forum in a blog page.I was knowing about Nabble from the past 6 months.although…

Facebook doesn’t share information with anyone,so there is no option to export the email ids of all your friends.There is a perfectly legal way to do so. Disclaimer: This is not a hacking tutorial.Using Yahoo importer you can download email ids of all your Facebook friends Steps to import email…

Rounded corners using below tools Adding rounded corners to images make it looks smooth.People who know photoshop can do it easily but what about others who don’t know to use Photoshop?.There are loads of free software’s other than photoshop that helps you to add rounded corners to your photos.You…
Adding watermark to images are very important to protect your original work.a watermark pic is hard to steal.adding watermark to images are very easy and there are free softwares to do so.but what if you don’t want to use a software instead watermark images online.Here is the list of free…

You may have faced a situation when you are not able to browse any websites even though you internet connection is working properly.This problem may be caused due to a possible infection of the host file. or when the DNS Cache gets corrupted or due to Antivirus and Firewall programs.Today…

Firefox,chrome and other browsers give us the option to bookmark all our favorite websites,so that we can revisit them easily without having the trouble to remember the url.all of us know about it but how to save all those bookmarks? or to create a backup of those important bookmarks? Follow…

Portable softwares are very useful especially for people who travel.these portable softwares run from flash drives.The best part about it is that your data and settings are stored on the flashdrive or usb and when you remove the device all your data is safe as no personal data remains Here…

Lets find a way to count the no of words in a document online.no matter if its not a document you can also copy paste your content and check the no of words.My previous post was regarding Editing PDF files online. The word counter tool is an essential and very…

PDFescape is an online PDF editor for basic editing. Its not an advanced editor but for an instance if you want to add some text or sticky notes or want to whiteout some text from the PDF file then PDFescape is a good choice. PDFescape is pdf editor and a…

IFSC Codes mean “INDIAN FINANCIAL SYSTEM CODE” that are assigned by the Reserve Bank of India.You need IFSC Code also to verify your PayPal account.PayPal account can be verified using two ways first one is by linking your bank account and the second one is by linking your Debit/Credit cards.…

Whenever i come across an interesting blog or website the first thing i do is to bookmark it so that i can easily access the blog whenever i need.and thats what all of us do.But what if your browser stopped working or your system crashed and you had to format…
Twitter is one most of the most widely used sites for Social Networking and Business Networking.with an alexa rank of 10.ok lets come to the topic.Adding a twitter button to your blog posts is really essential as it helps your readers to easily share the posts.Every blog owner loves it when someone…

Double post problem is not because of your template but it might have happened when you tried to change the blog template. When you upload a new template for your blog ,Blogger ask you whether you want to delete these widgets or choose to keep it. This option is useful…

Do Follow and No Follow are popular terms used by blogger all over.Understanding these terms is very important if you are trying to build backlinks for your blog.backlinks helps in increasing search engine rankings.For the newbies i will make this topic more simple and easy to understand.Any link you see…

As well all know that Facebook is a great place to find old friends and meet some new friends too.over 350 million active users and with Alexa traffic rank: 2 . Facebook is not only a place to be in touch with your friends but also where you can play…

Did you all try creating your Resume Online using Happy CV? .Please give me your comments on HappyCV.Well have you ever imagined to load all the youtube videos in one screen! yes its possible using psykotube .For example if you want to search for a video from “step up”. then simply enter your keyword…
Hope you all liked my last post Increase Traffic By 150-300% With Wahoha- Unique Visitors Today Lets create a Resume today without using Ms-word.how is that possible? Ms-word is primarily used to create resumes.Yea thats correct but Happycv is something different it lets your create your perfect resume online.you need not be a geek to use…

Tired of submitting your blog to blog directories,rss directories, Bookmarking, pinging ,manual traffic exchange.social networking and bookmarking sites!! well all these sources give traffic but no much and its just temporary and usually bounce rate increases.manual link exchanging does bring in traffic but its not guaranteed.now you might be wondering what else…

In my last post i had written about “How to stop following a blog on Facebook” Today lets see how to change your personal Facebook URL.previously our Facebook URL consisted of some long string with a words and some numbers in it,which was impossible to remember.Now Facebook has started a service which enables you to…

Hello guys! I’m back with a new post on how to transform your twitter page online without any hassles.My previous post was “Create a chat room using TaPingYa“. which was completely different from what i have posted now. Everyone who has twitter…
My last post was about Graffiti-A Fun Based Facebook Application That Lets You Draw On Your Friends Wall. now i will show you on how to create your own chat room.it can be personal or a public chat room.it has features like Password protection,iM integration and twitter integration. Features of TaPingYa : Create…

My previous post was about how to Extend Trial Period Of Any Shareware Using Trial Reset today i with a different post its a cool Facebook fun tool.everybody who’s on Facebook loves to greet friends or welcome them is some unique way.how about writing or drawing on your friends wall. doesn’t it seem to be cool…

My previous post was about how to clear the Google tracking cookies freely using G-Zapper. How to extend period of any shareware using Trial Reset ? Disclaimer: This is not a hacking tutorial.this post explains the functions of Trial Reset Software. Today lets see how to Reset the trial period…

Did you know google tracks your search keywords by storing a unique identifier in a cookie on your pc.This info is used to compiled reports on users habits.Who knows google will sell the info in the future or share it with some one.Not only google cookie some computers have…

Everyone who owns a website or blog is concerned about SEO,and getting quality back-links from all over the web is an equally important part of “Search engine optimization”.and more over links from “do-follow” site means improving your ranking.So here is the question, “How do i find if a site…

In my previous post i wrote about How to check do follow and no follow links? .Today i will show you another way to check the same using a simple Google Chrome extension called “nofollow.crx”. This is really simple,this amazing tool simply highlights all the nofollow or noindex link using red…

Wondering how to add music to your blog.adding some music also pleases the visitors.and in some way increases the time on page.In this post you will know how easy it is.You will need to create an account in free music hosting site.(just search in Google for free music hosting sites) and also…

The most commonly used Resolution is 1024 x 800 and 1024 x 768.This is what the stats say.and the experts suggest that website should be optimized at 1024 x 800 or 1024 x 768 as this is the most commonly used.take look at the pie diagram …

Blogger or a Website owner should always see to it that their blog/website is user friendly (includes easy navigation,simple language,a good design) and also an important part of it is compatibility in different screen resolutions.The most used resolutions are 1200 x 800 and 1024 x 768. If your blog/website is…

How To Test RAM Using Memtest86+ RAM- Random Access Memory,is one of the things that get damaged easily in a system and Bad RAM is the root cause of many computer problems such as randomly restarting or not booting at all.and most of the times the OS is blamed.…

A very simple tutorial to help you to change your Blog address.follow these simple steps and get your job done. 1)Click on Dashboard 2)Now click on Settings and then select Publishing 3)Enter the blog address you want and enter word verification …

What if you want to unfollow a blog that you are following.Doing this is very easy. Follow this easy tutorial : 1) Log into Blogger,click on Dashboard 2) Then scroll down click on Manage 3)Then a new dialog box…

Every blogger loves constant traffic to their blogs and its really a hectic task .A lot of work is to be done so that the blog gets the needed publicity. There are two ways to achieve this PAID and FREE.People who don’t have problem spending $$, use the PAID route,but…
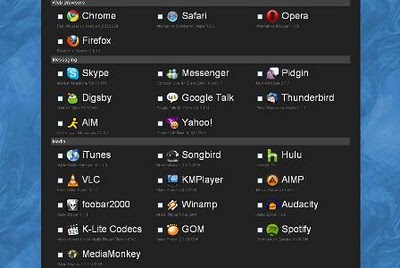
Ninite is a free service that offers everyone an easy rather simple way to install their favorite applications.Its very useful if you have just reinstalled your OS.It allows the users to select their fav application from the list and then install them using an Installer that they provide.There is not need…
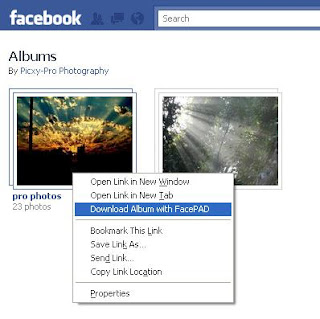
A Facebook user like me loves to share photos and to download beautiful images to the Hard drive. But saving an Entire album is a time consuming task.Facebook does not have this option to download an entire album.But now this can be easily done using Facepad .its a Firefox addon. Download…
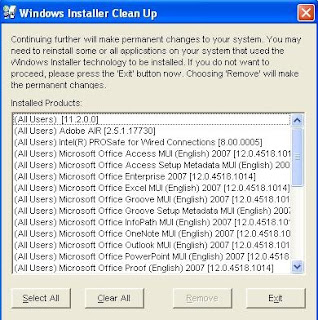
The Windows Installer Clean up Utility is helpful in safely removing the Windows Installer Settings from your PC if there is some problem.There are several reason when Windows Installer becomes damaged. The commons reasons why Windows installer is damaged: Whenever a windows registry setting used by windows installer is changed…

This article will help you add meta tags to blogger. If you need more traffic from Search engines, then Meta Tags should be given high priority.They help search engines to Index your site easily. Matt Cuts head of Google’s Webspam team says that Google ignore meta tags, still a lot…

My last post was about Diigo: Personal Information Management System .Today i’m going to tell you guys about a Geeky Twitter tool that allows you to manage your twitter followers in a breeze . Its really a hectic task to manage twitter followers,isn’t it? especially when you have a large fan following or your constantly…

Diigo is a cloud based personal information management system. It provides you with tool on all major web browsers, Android iPhone and iPad.It helps you to collect and access a variety of information. All the item which you collect goes to my library on the Diigo server, that is in…

Hello, Friends i’m back with a new post,well this one is similar to the previous post(how to delete gmail account).here i will show you how to delete yahoo account permanently without having any trouble.All you need to do is follow the link that i paste over here.enter your id and…

To delete Gmail account permanently you will have to follow the below mentioned steps. It won’t take a minute to permanently delete your account. Think twice before deleting it as you won’t get your account back once deleted. Direct Links to Delete your Gmail Account: https://accounts.google.com/DeleteCaribouService https://www.google.com/accounts/DeleteAccount Follow…

Both my previous posts,”Renaming recycle bin” & “Removing recycle bin from the desktop” had a warning “Backup your registry”.yes! Registry backup is very important especially when you are trying to edit the registry. A lot of users don’t exactly understand what the Registry is all about and the need for…

My previous post was “How to remove the Recycle Bin from the Desktop“.Today i will show you how to Rename the Recycle Bin in XP.renaming recycle bin is not allowed by default,there is no such option for it.Did you ever wish to change the name from Recycle bin to something…

Let me start my first post by showing you the steps inorder to remove the Recycle bin icon from your desktop.well its interesting isnt? Have you tried deleting the Recycle bin by pressing the’ DEL’ button on you keyboard ? many of us might have tried doing this but we are unable…